Category: Uncategorized

  • Phoenix Garage Door Tuneup Example: What It Covers

    Phoenix Garage Door Tuneup Example: What It Covers

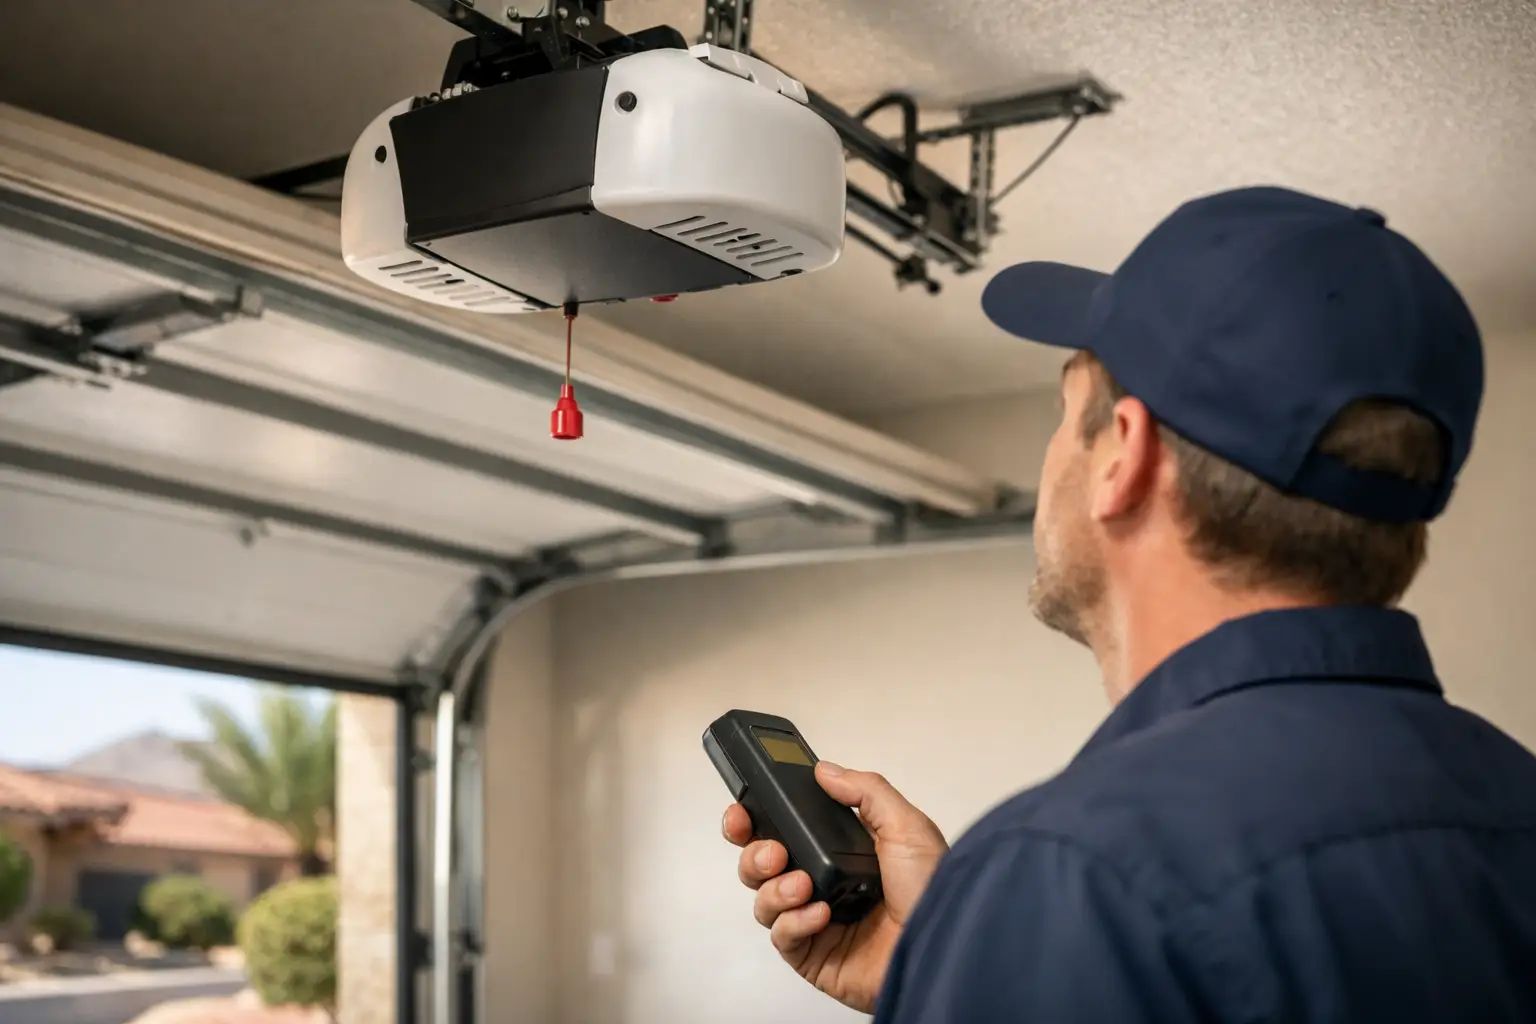
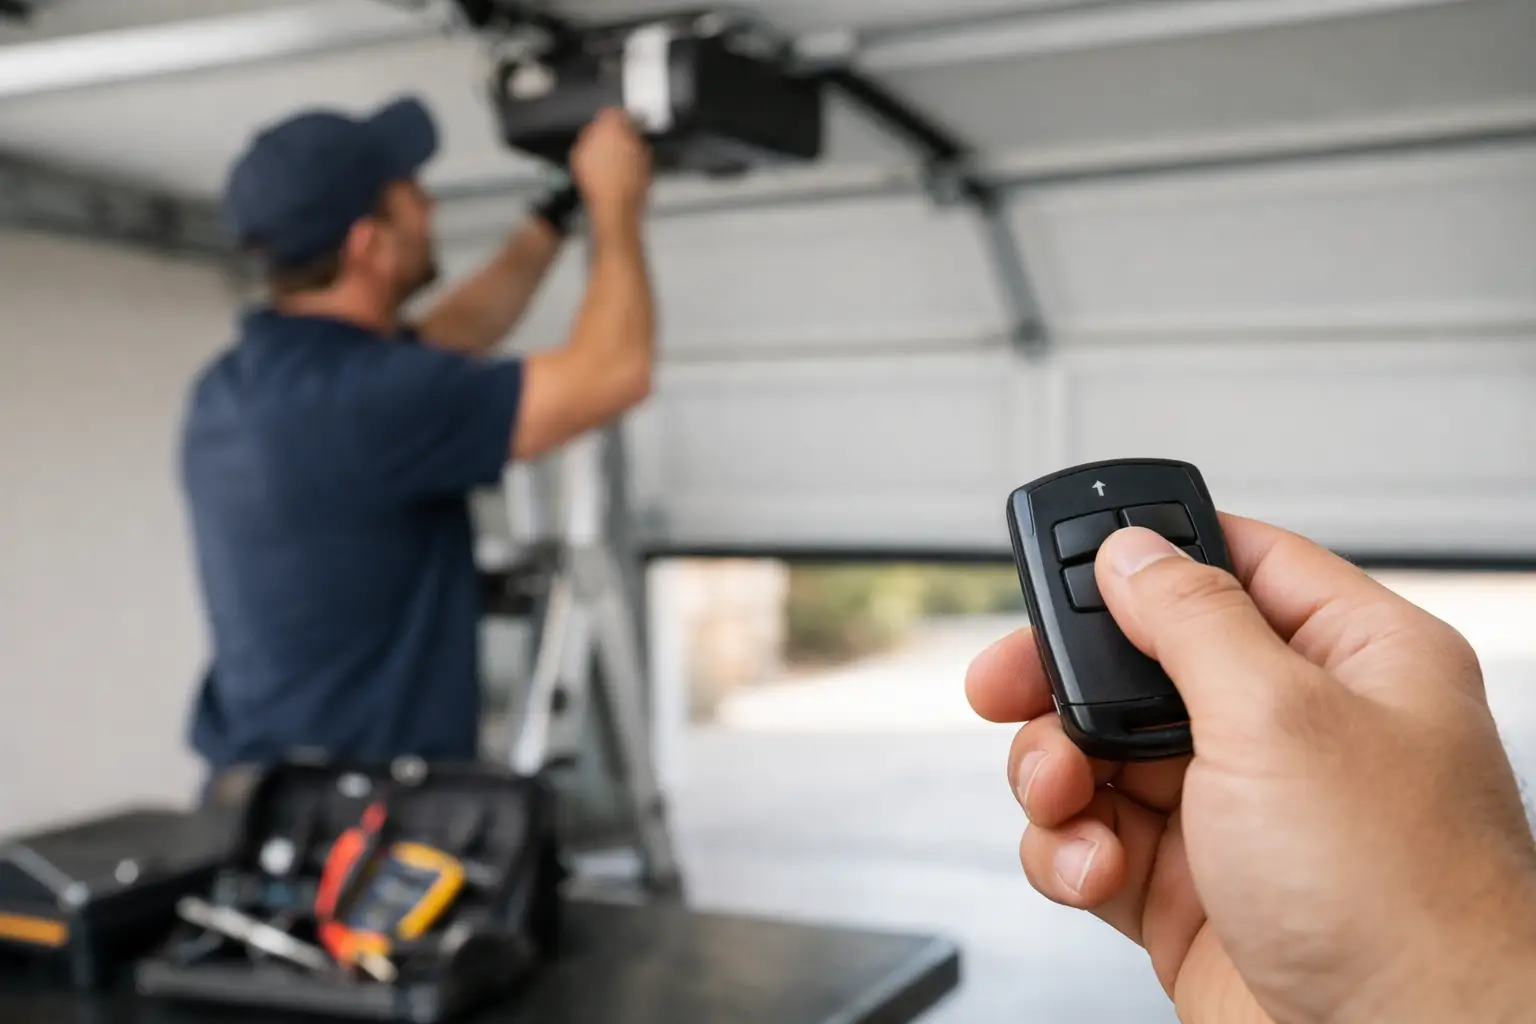
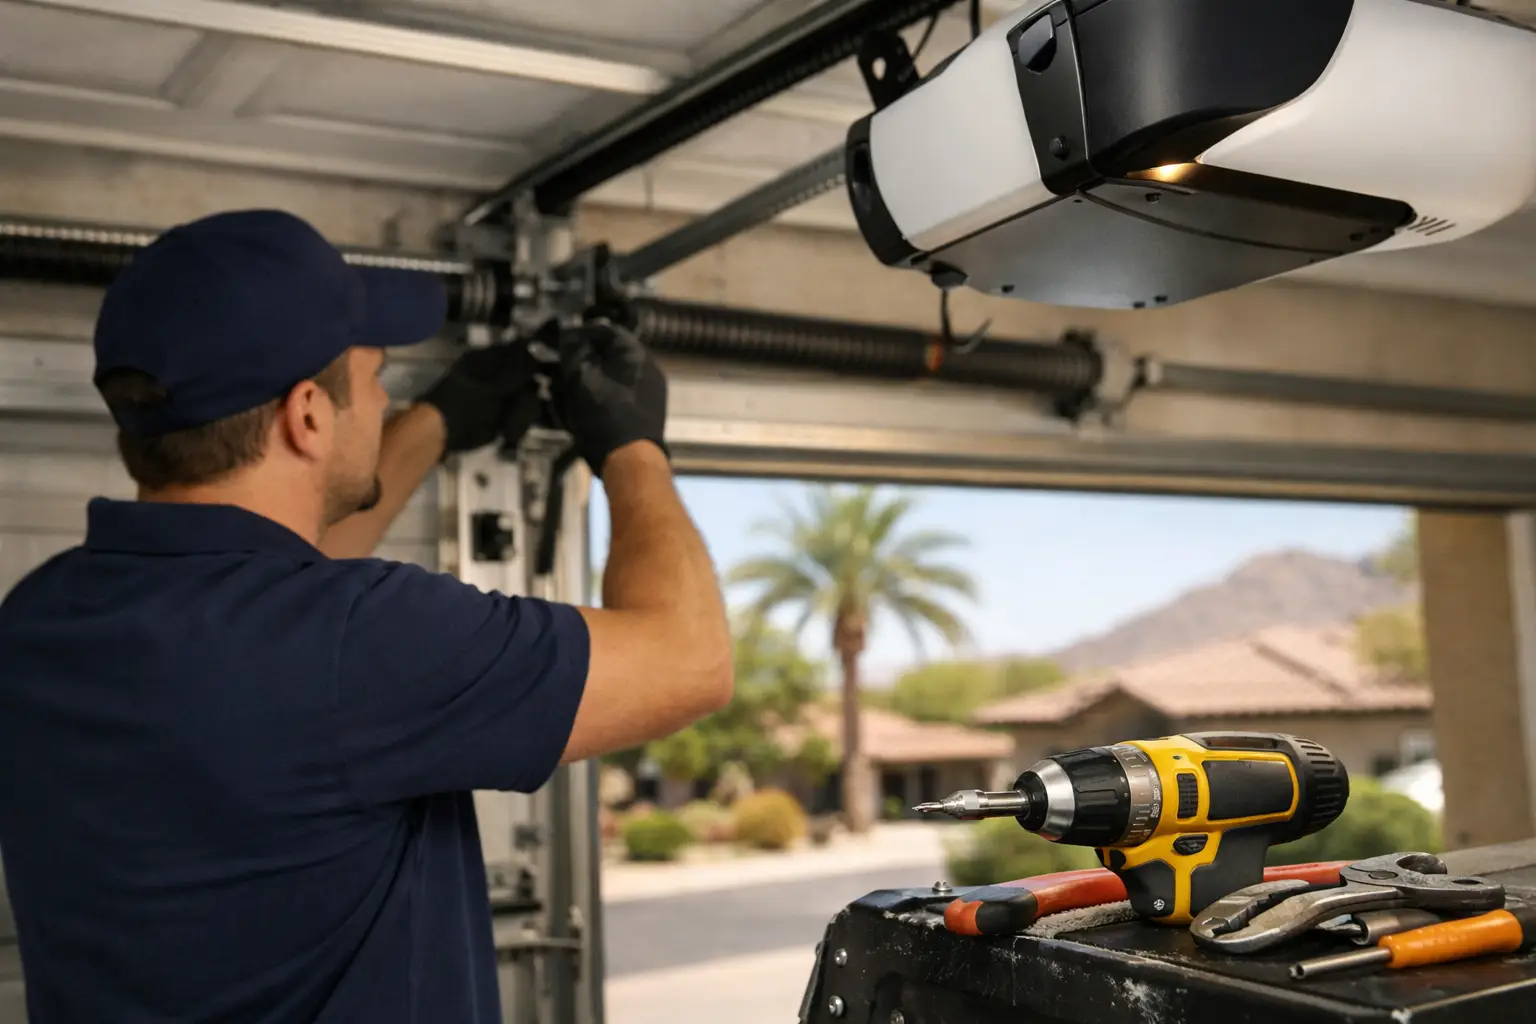
    A garage door can seem fine right up until the morning it will not open, starts shaking across the tracks, or leaves your vehicle stuck inside. This Phoenix garage door tuneup example shows what a useful maintenance visit should look like for an everyday homeowner – not just a quick spray of lubricant and a few minutes in the driveway.

    In the Arizona heat, garage doors work harder than many people realize. Dry weather, dust, hot metal, aging rollers, and frequent daily use can all add up. A professional tuneup is designed to catch small issues before they turn into a broken spring, damaged opener, or door that is unsafe to operate.

    A Phoenix Garage Door Tuneup Example From Start to Finish

    Imagine a homeowner in Phoenix calls because their double garage door has become louder over the last few months. It still opens and closes, but it jerks near the middle of travel and the opener light flickers when the door reaches the floor. There is no emergency yet, but the door is giving clear warning signs.

    A proper tuneup starts with a conversation. The technician asks when the noise began, whether the door ever reverses unexpectedly, if anyone has noticed a gap at the bottom, and whether the opener has been struggling. Those details help narrow down the cause before adjustments begin.

    Next comes a visual inspection of the full system: door sections, hinges, rollers, tracks, cables, springs, brackets, bearing plates, opener rail, safety sensors, and bottom weather seal. The goal is not to sell parts that are not needed. It is to identify wear, explain what is urgent, and give the homeowner clear options with no surprises.

    Step 1: Check the Door’s Balance

    The technician disconnects the opener and manually moves the door, using safe procedures. A balanced garage door should stay near the halfway point instead of dropping to the floor or racing upward. If it will not hold position, the springs may need adjustment or replacement.

    This is one of the most important checks in any garage door tuneup. Springs carry the door’s weight. When they are not doing their job, the opener has to pull far more than it was built to handle. That extra strain can shorten the life of an otherwise good opener.

    Spring work is not a homeowner DIY project. Torsion springs are tightly wound and can cause serious injury if handled incorrectly. If a balance problem is found, a trained garage door technician should make the correction.

    Step 2: Inspect Rollers, Hinges, and Tracks

    In this example, several steel rollers are worn and making a rattling sound as they move through the track. The hinges are intact, but a few fasteners have loosened from normal vibration. The tracks are also dusty, though they are still properly aligned.

    The technician tightens accessible hardware, checks track mounting, and makes sure the rollers are traveling smoothly. If the rollers are badly worn, replacement may be the smarter choice rather than trying to stretch a few more months out of them. Nylon rollers often run quieter than older steel rollers, but the best option depends on the door, budget, and how much noise reduction the homeowner wants.

    Tracks should not be heavily greased. Grease attracts dust and grit, which can create a messy buildup in Arizona. Instead, the tracks are cleaned as needed while the moving parts that require lubrication receive the correct garage-door-rated product.

    Step 3: Lubricate the Right Moving Parts

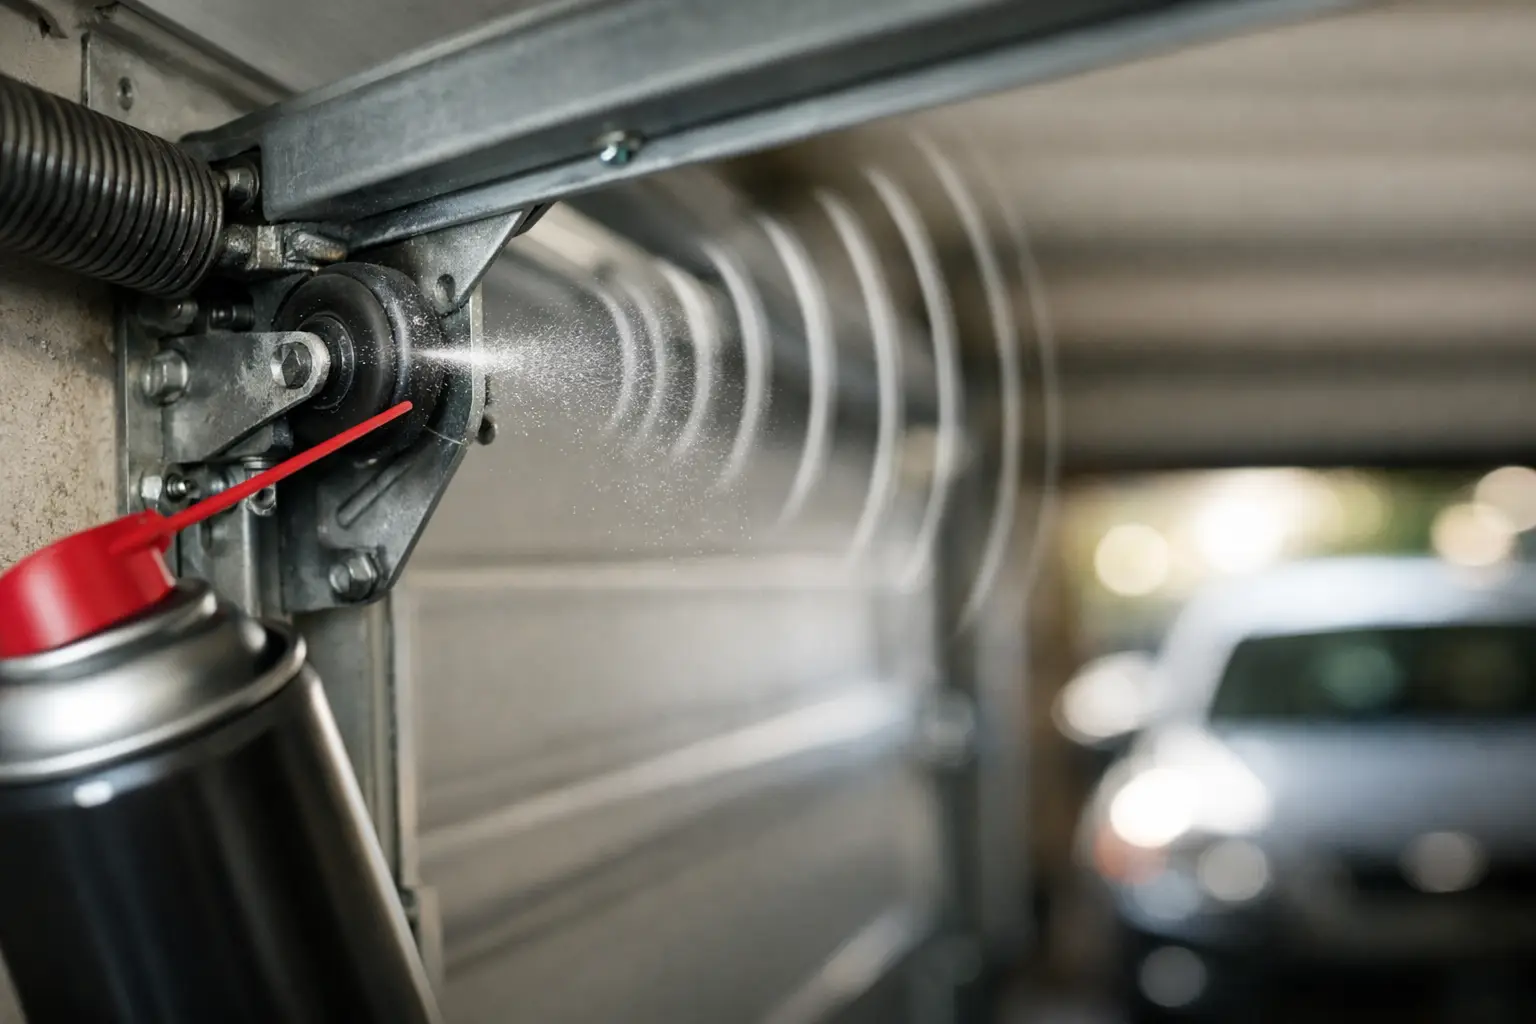
    A tuneup includes lubrication of the hinges, rollers with bearings, spring coils, bearing plates, and other appropriate moving points. This reduces friction and helps the door move with less noise and resistance.

    Lubrication helps, but it is not a fix for damaged components. A cracked roller, frayed cable, bent track, or weak spring needs more than spray lubricant. Honest maintenance means making that distinction clear.

    For this homeowner, lubrication noticeably reduces the squeaking, but it does not completely eliminate the rough movement. That points back to the worn rollers. The technician explains that the door is safe to use for the moment, but replacing the rollers soon will protect the opener and restore smoother operation.

    Step 4: Test Cables, Drums, and Safety Hardware

    Cables are inspected for fraying, corrosion, slack, and proper placement on the drums. Even a small cable issue can turn into a door that hangs crooked or becomes stuck. Because cables operate under tension, they should be inspected and repaired by a professional rather than adjusted at home.

    The technician also checks the brackets that connect the door to the lifting system. Bottom brackets deserve extra caution because they are connected to the high-tension cables. Tightening the wrong fastener without knowing what it does can be dangerous.

    A good tuneup also includes a look at the door panels and reinforcement struts. In Phoenix, sun exposure can fade finishes and dry out weather seals, while strong winds can reveal weak sections in an older door. Cosmetic wear may not require immediate action, but structural damage should never be ignored.

    Step 5: Test the Opener and Safety Sensors

    The opener is only one part of the system, but it gets blamed for many problems caused by the door itself. Once the door is checked and balanced, the technician tests the opener’s force settings, travel limits, remote controls, wall button, and manual release.

    The photo-eye safety sensors near the bottom of the tracks are cleaned and aligned. These sensors should reverse the door if something crosses the beam while it is closing. The auto-reverse feature is also tested to confirm the door reverses when it meets resistance.

    In this tuneup example, the opener is working properly, but its close-force setting was slightly high because it had been compensating for the door’s rough travel. After the maintenance adjustments, the setting can be corrected. That is better for the opener and safer for everyone using the garage.

    If an opener is older, loud, or lacks modern safety and convenience features, replacement may be worth discussing. Still, replacement should be based on its condition and the homeowner’s needs, not pressure. Many openers can keep working well after a tuneup if the door is properly balanced and maintained.

    What the Homeowner Receives After the Tuneup

    At the end of the visit, the homeowner should understand what was checked, what was adjusted, and what may need attention later. In this case, the immediate maintenance includes tightening hardware, cleaning key areas, lubricating moving parts, aligning sensors, and correcting opener settings.

    The technician recommends replacing the worn rollers within the next few months. There is no broken spring or failed opener, so the homeowner can choose whether to schedule the upgrade now or plan for it soon. That is the kind of transparent guidance that helps people make a confident decision without feeling rushed.

    A clear estimate should separate necessary repairs from optional upgrades. For residential customers, Riggs Rescue AZ focuses on straightforward recommendations, affordable solutions, and no residential service or trip charges. If something needs repair, you should know why it matters before work begins.

    When a Tuneup Is Enough – and When It Is Not

    A tuneup is a smart choice when the door is noisy, moving less smoothly, showing minor vibration, or overdue for routine care. For most homes, annual maintenance is a practical starting point. Doors used multiple times each day, exposed to heavy dust, or serving a busy household may benefit from more frequent attention.

    Some problems call for repair rather than maintenance. A snapped spring, frayed cable, bent track, door off its track, broken panel, or opener that will not respond needs prompt professional service. Do not keep forcing a garage door that is binding, crooked, or unusually heavy. That can create more damage and increase the safety risk.

    Commercial doors and gates have their own maintenance needs, especially where daily traffic affects business access and security. In those cases, a service plan may make more sense than waiting for a breakdown.

    Your garage door does a lot of work quietly, until it cannot. A timely tuneup gives you a chance to hear what the system is telling you, make informed repairs, and keep one of your home’s largest moving parts working safely when you need it most.
  • Commercial Overhead Door Selection Guide

    Commercial Overhead Door Selection Guide

    A commercial door that sticks halfway open at 7 a.m. can delay deliveries, frustrate employees, and leave expensive equipment exposed. This commercial overhead door selection guide helps business owners and property managers choose a system that fits the way their building actually works – not just the opening size or the lowest initial price.

    The right door should protect your property, support daily traffic, and hold up in Arizona heat. Whether you manage a warehouse in Mesa, an auto shop in Gilbert, a storage facility, or a busy retail loading area, the best choice depends on use, security needs, available space, and long-term service expectations.

    Start With How the Door Will Be Used

    Before comparing materials or colors, look at what happens at the opening each day. A door used twice daily for employee parking has different demands than one opening 40 times a day for deliveries. Frequency matters because springs, cables, rollers, openers, and tracks all experience more wear as cycle counts rise.

    Think through who operates the door and what moves through it. Forklifts, delivery trucks, service vans, customers, and employees each create different clearance and safety requirements. If vehicles back close to the opening, consider whether you need sensors, warning devices, bottom-edge protection, or a more visible door finish.

    Also consider downtime. A small service bay may be able to pause operations for a repair. A distribution facility or fire station may not have that flexibility. In high-use settings, spending more on a higher-cycle spring system, dependable operator, and planned maintenance can be far less expensive than losing access during a busy workday.

    Choose the Right Commercial Door Style

    Commercial overhead doors are not one-size-fits-all. The door style should match the building layout, security requirements, climate exposure, and how much daily use it will receive.

    Sectional steel doors

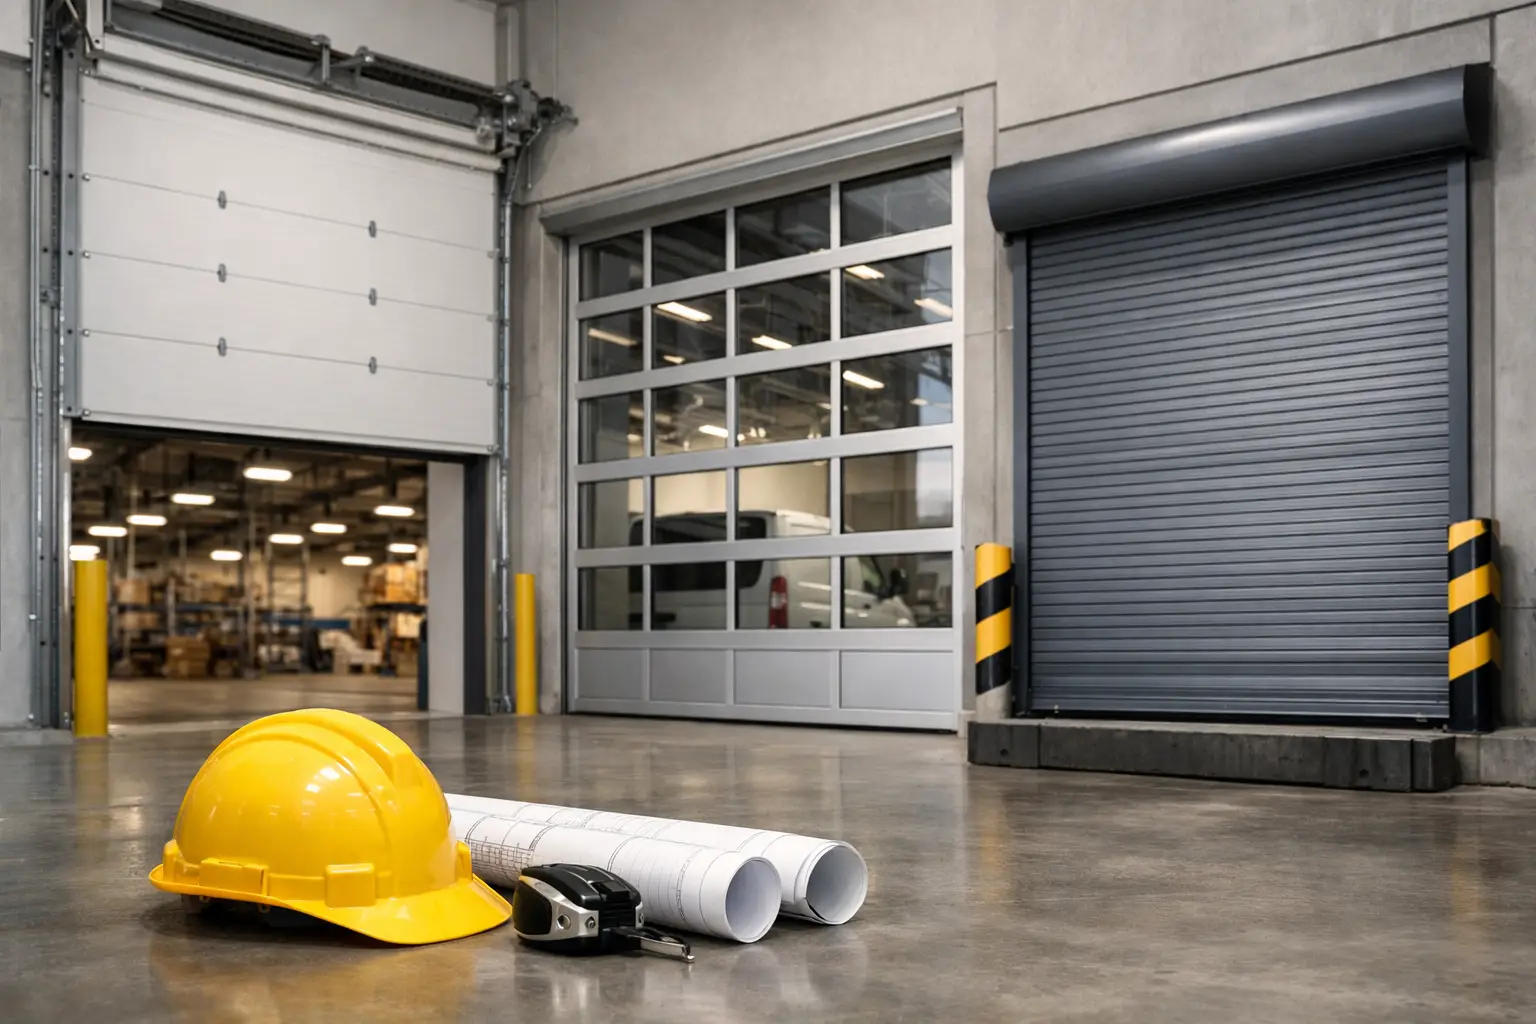
    Sectional steel doors are a practical choice for many commercial properties. They move upward on tracks and sit overhead when open, preserving the space in front of the building. They are commonly used for service bays, warehouses, loading areas, and commercial garages because they offer solid security, dependable performance, and a wide range of insulation options.

    Steel doors can be a smart long-term value, but the gauge, panel construction, hardware, and finish all matter. A lightly used storage opening may not need the same hardware package as a high-traffic automotive shop.

    Rolling steel doors

    Rolling steel doors coil into a compact space above the opening. They are often a good fit where ceiling room is limited or where security is the primary concern. Storage facilities, back-of-house retail areas, warehouses, and industrial buildings often use them for that reason.

    The trade-off is that rolling doors may have a higher upfront cost and require the correct headroom and side-room clearances. They also need professional installation and periodic service to keep the curtain, guides, springs, and operator working safely.

    Full-view aluminum and glass doors

    Full-view doors bring natural light into showrooms, restaurants, vehicle service facilities, and customer-facing spaces. They can create a clean, modern appearance while maintaining an overhead door format.

    They are not always the best answer for every building. Glass panels may offer less privacy, and the door needs the right glazing and frame construction for security, weather, and energy goals. For a business where appearance matters as much as access, they can be a worthwhile investment.

    Insulated or specialty doors

    Insulated doors are especially useful for climate-controlled warehouses, food service areas, conditioned workspaces, and buildings that face direct Arizona sun. Specialty options may include fire-rated doors, high-speed doors, or doors designed for unique openings and operational needs. These systems should be selected based on code requirements and the consequences of a door failure, not simply on appearance.

    Insulation Matters More Than Many Owners Expect

    Arizona businesses deal with more than high afternoon temperatures. Heat can build up in metal buildings, work bays, and loading areas, placing extra strain on cooling systems and making indoor work less comfortable.

    An insulated commercial overhead door can help limit heat transfer, reduce outside noise, and provide a more substantial panel construction. Look at the door’s R-value, which measures resistance to heat flow. A higher R-value can be helpful, but it is not the only decision point. Gaps around the opening, damaged weather seals, poor wall insulation, and frequent door use can all affect real-world energy performance.

    For a door that stays closed most of the day, insulation can make a noticeable difference. For a loading door that remains open for long stretches, fast operation, dock procedures, and air-control solutions may matter just as much. The best choice comes from looking at the entire opening, not just the door panel.

    Match the Operator to Traffic and Safety Needs

    A commercial operator should be selected for the door’s size, weight, use frequency, and operating style. A residential-style opener is not designed for many commercial applications, particularly large or heavy doors. Choosing an undersized operator may save money at installation but can lead to early wear, unreliable operation, and avoidable repair calls.

    Commercial operators can be set up with wall controls, keypads, remotes, pull stations, timers, vehicle detectors, and access-control systems. The right controls depend on who needs entry and when. A staff-only warehouse door may benefit from controlled access, while a service bay might need simple, quick operation throughout the day.

    Safety devices should never be treated as optional add-ons. Photo eyes, monitored sensing edges, warning lights, and audible alerts help protect people, vehicles, and inventory. They are also a practical way to reduce the risk of a costly accident near a busy opening.

    Plan for Security, Not Just Strength

    A heavy door helps, but commercial security is about the full system. The tracks, locks, operator controls, emergency release, access points, and surrounding building conditions all play a role.

    For openings that contain tools, vehicles, inventory, or sensitive equipment, consider how the door is secured after hours. You may need interior slide locks, automatic operator locking features, restricted remote access, or a door style with minimal window exposure. If employees or vendors come and go at different times, access-control options can also help you know who can enter without distributing keys or shared remotes.

    Security needs vary by property. A small enclosed service area may need a straightforward steel sectional door and reliable locks. A facility with valuable inventory or an exposed rear entrance may justify a rolling steel door, upgraded controls, and a more detailed security plan.

    Confirm Measurements and Building Conditions Early

    The width and height of the opening are only the starting point. A qualified technician should also inspect headroom, sideroom, backroom, ceiling obstructions, sprinkler lines, electrical access, roof slope, and the condition of the jambs and header.

    These details determine what track system, spring setup, and operator configuration can be installed safely. Low headroom, for example, may require a specialized track arrangement. A sloped ceiling or overhead ductwork can affect where the door travels when open. Catching those limitations before ordering a door prevents delays, unexpected costs, and last-minute compromises.

    If the existing door has failed, do not assume the replacement should match it exactly. Your business may have changed since the last installation. Higher traffic, new vehicles, added climate control, or updated security expectations may point to a better system.

    Compare Total Cost, Not Just the Quote

    A lower-priced door is not always less expensive over its service life. Compare the complete installation: door construction, springs, cables, rollers, track, operator, controls, safety equipment, weather sealing, warranty, and expected maintenance.

    Ask direct questions before approving the work. What cycle rating is included? Is the operator sized for the door and expected traffic? Which safety devices are part of the quote? What maintenance will the system need? A clear answer now helps avoid surprises later.

    For many commercial properties, planned maintenance is part of a smart door selection. Regular inspections can catch worn rollers, loose hardware, frayed cables, failing sensors, and operator issues before they stop the door at the worst possible time. It also gives you a clearer picture of when repair is still reasonable and when replacement is the better investment.

    A Practical Commercial Door Selection Checklist

    Before making a final decision, make sure your choice addresses these five areas:

    • Daily cycles and the required spring and operator rating.
    • Door style, material, insulation, and weather protection.
    • Vehicle clearance, ceiling space, and building conditions.
    • Security controls and safety devices for employees and visitors.
    • Installation cost, expected maintenance, and the cost of downtime.

    A commercial overhead door is part of your operation, not just part of the building. Choosing it carefully means fewer interruptions, better protection, and a door that works as hard as your business does. If you need straightforward guidance for a commercial property in the East Valley, Riggs Rescue AZ can inspect the opening, explain the options clearly, and help you move forward with a fast, reliable, and affordable plan.

  • 7 Best Smart Garage Door Upgrades for Arizona Homes

    7 Best Smart Garage Door Upgrades for Arizona Homes

    A garage door that closes when you leave, alerts you when it opens, and works during a power outage is more than a nice convenience. For busy Arizona households, it can prevent a rushed morning from becoming a security concern. The best smart garage door upgrades add control and peace of mind, but the right choice depends on the age of your door, opener, Wi-Fi signal, and how your family actually uses the garage.

    A smart feature should make access simpler without creating a new source of frustration. Before buying a device, start with a garage door and opener that operate safely and reliably. Smart technology cannot fix worn springs, a noisy chain, a damaged door panel, or a door that reverses unexpectedly. Get the mechanical side right first, then add the features that make everyday access easier.

    Best Smart Garage Door Upgrades to Consider

    1. A Wi-Fi-enabled garage door opener

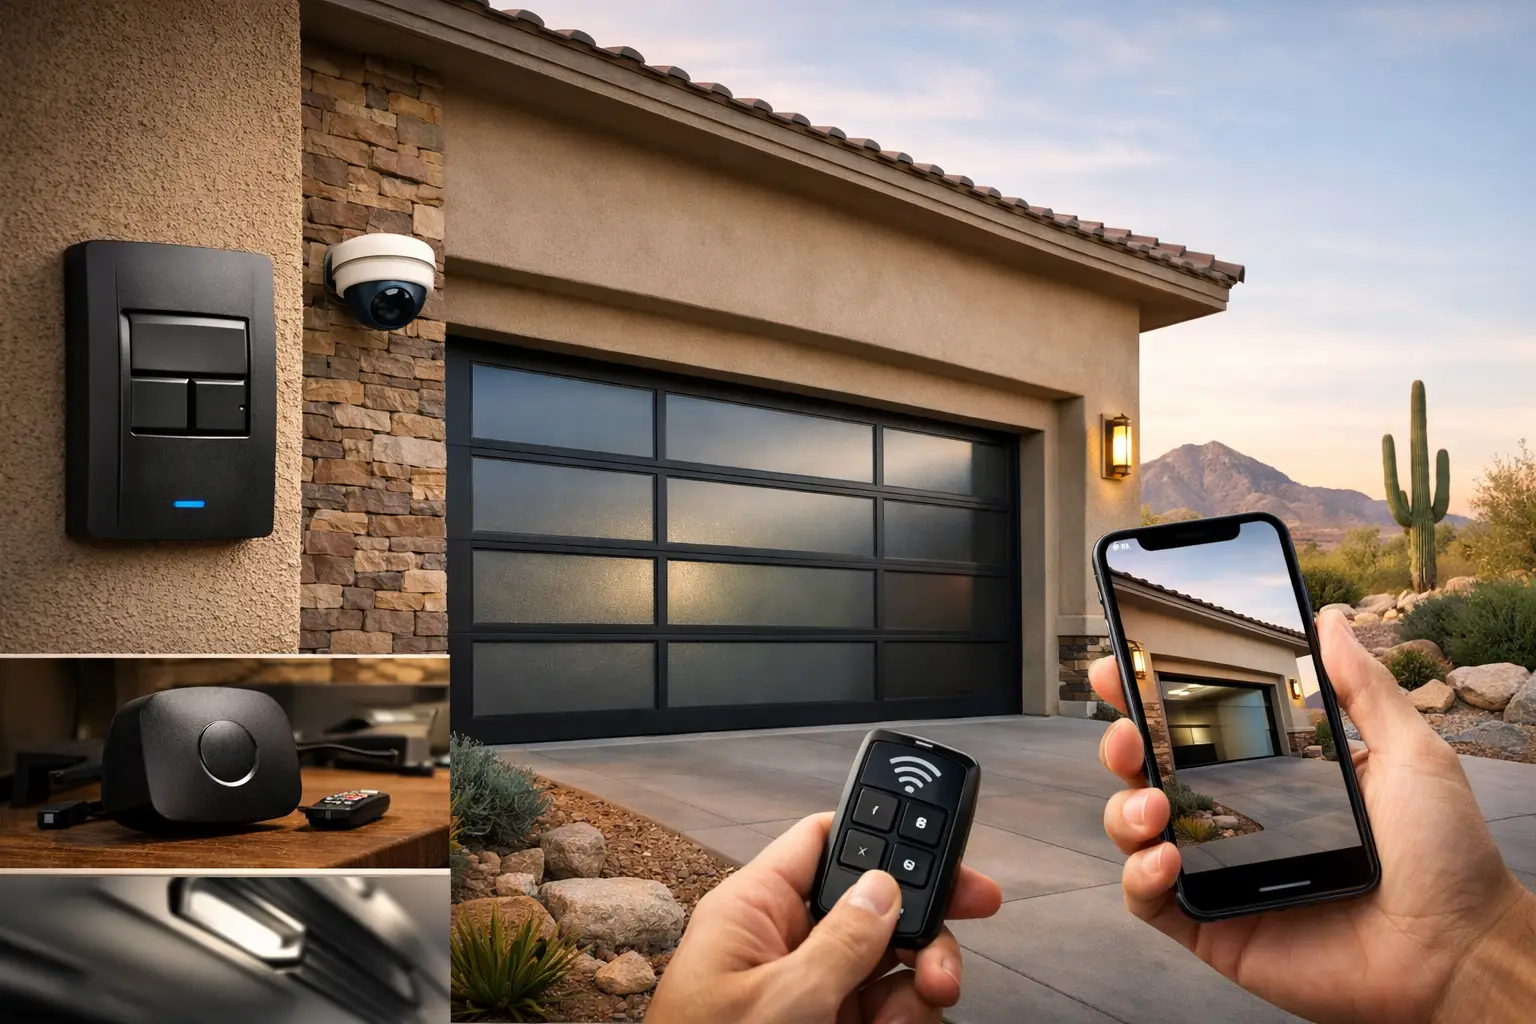
    For many homeowners, replacing an aging opener with a modern Wi-Fi model is the most complete upgrade. These openers connect to an app on your phone, allowing you to check door status, open or close the door remotely, receive activity alerts, and give access to trusted people when needed.

    This option makes the most sense if your current opener is older, unreliable, loud, or missing key safety features. Newer belt-drive openers are especially popular for attached garages because they are much quieter than many older chain-drive units. That matters when bedrooms, home offices, or living spaces sit above or beside the garage.

    Look for an opener with battery backup. Summer monsoon storms, grid issues, and unexpected outages can happen, and battery backup lets you operate the door when the power is off. If you use the garage as your main entrance, that feature can be worth the added cost.

    The trade-off is simple: a full opener replacement costs more than adding a controller to a working opener. Still, when an opener is near the end of its service life, installing a smart model once is usually the cleaner, more dependable path.

    2. A smart garage door controller

    If your existing opener works well and is compatible, a smart controller can bring app-based control to your current system. The controller connects to the opener and uses a sensor to confirm whether the door is open or closed. You can then control the door from your phone and receive notifications.

    This is often a practical choice for homeowners who want remote access without replacing an otherwise dependable opener. It can also be useful for a detached garage where you want status alerts but do not need every feature included with a brand-new opener.

    Compatibility matters here. Some older openers, specialty systems, and certain wall-control setups may need additional parts or may not support every feature. Wi-Fi strength inside the garage also matters. A smart controller is only helpful if it stays connected. If your signal is weak, a Wi-Fi extender or a better router placement may be needed before installation.

    3. Smart access sharing for family, guests, and service pros

    Handing out garage remotes is easy until you lose track of who has one. Smart access sharing gives you more control. Depending on the system, you can provide temporary, scheduled, or recurring access through an app instead of passing around physical remotes or keypad codes.

    This works well for families with teen drivers, dog walkers, house cleaners, contractors, and visiting relatives. A parent can make sure a child got home safely without asking for a text. A small business owner can allow a delivery or maintenance appointment into a secured work area, then remove access afterward.

    Do not treat digital access as a replacement for good security habits. Review shared permissions occasionally, remove old users, and use a strong password with multi-factor authentication when available. If a former tenant, employee, or contractor still has access, it is time to change that.

    4. A wireless keypad with temporary codes

    A wireless exterior keypad remains one of the most useful garage upgrades because it gives you a dependable entry option when you do not have your remote or phone in hand. Modern keypads can support personal codes and, on some systems, temporary codes for visitors or service appointments.

    A keypad is especially helpful for active families. You can go for a walk, take the dog out, or head to the community pool without carrying keys. It also gives you a backup way into the garage if your vehicle remote battery dies.

    Choose a location that is accessible but not obvious from the street, and avoid easy-to-guess codes such as your address or birth year. If the keypad buttons are faded, sticky, or unreliable, replacement is usually more affordable than waiting until you are locked out.

    5. A garage camera or video-enabled opener

    A garage camera can help you verify what triggered an alert, see whether the door actually closed, and check activity around one of the most common entry points in the home. Some newer openers include built-in cameras, while separate cameras can monitor the garage interior, driveway, or side entry.

    This upgrade is valuable if you receive package deliveries, store tools or bikes in the garage, or want another view of activity at your home. For small businesses, cameras around commercial garage doors or gates can also provide useful visibility during deliveries and after-hours access.

    Placement makes a difference. A camera pointed directly into bright Arizona afternoon sun may give you poor video at the exact time you need it. Think about glare, night visibility, privacy, and whether the camera can clearly see the door and the area you want to monitor. Cameras add awareness, but they do not physically secure a weak door or replace a working lock.

    6. Backup power and surge protection

    Smart features are great until the opener has no power. Battery backup protects your ability to enter and exit during an outage, while surge protection can help protect sensitive opener electronics from electrical spikes.

    If you are choosing between a basic smart opener and a smart opener with battery backup, consider how your garage is used. For a detached garage with another easy entrance into the home, backup may be less urgent. For a family that parks in the garage every day, it is a practical safeguard.

    Arizona heat is another reason to be thoughtful about electronics. Garage temperatures can climb quickly, especially in uninsulated spaces. Quality equipment, correct installation, and periodic inspection can help avoid premature failures. Never install electronics where they are exposed to water, direct weather, or conditions outside the manufacturer’s recommendations.

    7. Safety sensors, lighting, and a tune-up that supports the tech

    The smartest app in the world cannot compensate for a garage door that is unsafe to operate. Photo-eye safety sensors should be aligned, clean, and tested regularly. The door should reverse when an obstruction is detected, and the opener force settings should be correct. These basics protect people, pets, vehicles, and the door itself.

    Upgraded LED lighting can also make the garage more useful and secure. Many modern openers include brighter, longer-lasting lighting that turns on when the door opens or when motion is detected. If you use the garage as a workshop, storage space, or main entry, good lighting is a daily improvement you will notice.

    A professional tune-up before or during a smart upgrade is money well spent. A technician can inspect springs, rollers, cables, hinges, tracks, sensors, and the opener’s operation. That gives your new technology a reliable system to work with instead of putting more strain on equipment that is already worn.

    How to Choose the Right Upgrade for Your Garage

    Start by deciding what problem you want to solve. If you regularly wonder whether you left the door open, a controller or Wi-Fi opener with alerts may be enough. If your opener is loud, inconsistent, or more than a decade old, a full smart opener replacement may offer better long-term value. If access control is the priority, add a keypad and manage shared digital permissions.

    Also consider the door itself. A heavy wood door, insulated steel door, or oversized commercial door may require an opener with the right lifting capacity and features. The opener does not do all the heavy lifting – properly balanced springs do – but the motor still needs to be matched correctly to the application.

    For homeowners in Gilbert, Mesa, Chandler, and nearby East Valley communities, a quick professional assessment can prevent compatibility surprises and unnecessary spending. Riggs Rescue AZ can help identify whether your current opener can be upgraded, whether a replacement makes more sense, and what safety or access features fit your home without hidden surprises.

    The best upgrade is the one you will use every day and trust when it matters. A reliable door, secure access, clear alerts, and a backup plan for outages can turn the garage from one more thing to worry about into an entry point that simply works.

  • How to Troubleshoot Gate Opener Issues Safely

    How to Troubleshoot Gate Opener Issues Safely

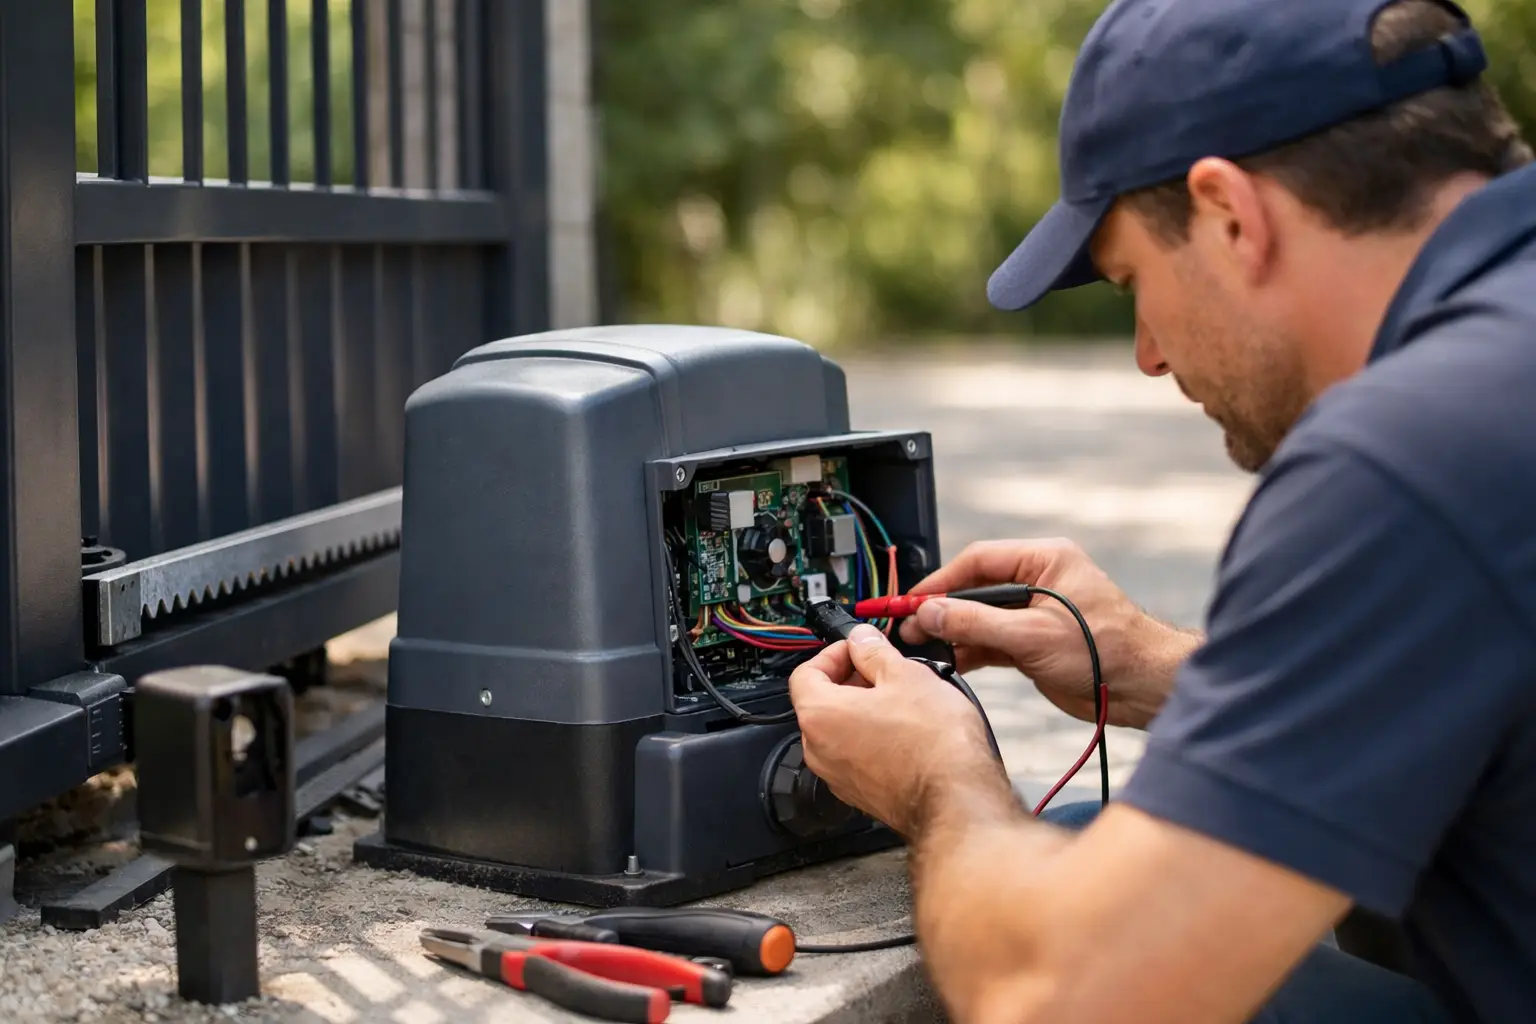
    A gate that will not open when you are trying to leave for work, get the kids to school, or let a delivery truck in is more than an inconvenience. Before assuming the opener has failed, there are a few safe checks that can narrow down the problem. Knowing how to troubleshoot gate opener issues can save time, prevent unnecessary damage, and help you recognize when it is time to call for professional service.

    Automatic gate systems combine electrical power, moving hardware, safety devices, and access controls. A small issue in any one of those areas can stop the whole system. Start with the simple possibilities, stay clear of moving parts, and do not force a gate that is binding or stuck.

    Start With Safety and the Gate’s Current Position

    If the gate is partially open, closed on a vehicle path, or moving unpredictably, keep people, pets, and vehicles away from it. Do not stand in the swing path of a swing gate or between a sliding gate and its fence line. These systems are heavy, and an opener can restart unexpectedly after power is restored or a control is activated.

    Look for obvious obstructions first. Rocks, branches, trash, landscaping debris, and even a shifted wheel chock can interfere with a sliding gate. For swing gates, check whether a vehicle, planter, or low-hanging branch is blocking the travel path. Arizona monsoon winds can blow debris into tracks and around photo eyes, while summer heat can stress electrical components and dry out moving hardware.

    If you can see a clear obstruction, remove it only when the gate is fully stopped and the opener is not trying to run. Never put hands near chains, belts, gears, hinges, rollers, or the gate operator arm.

    Check Power Before Assuming the Opener Is Bad

    A gate opener that appears completely dead may have a simple power problem. Check whether the breaker serving the gate operator has tripped. If it has, reset it once. A breaker that trips again is a warning sign of an electrical fault, damaged wiring, a failing motor, or another issue that needs a qualified technician.

    Next, inspect the operator’s power source. Some systems use a standard outlet, while others are hardwired. If the unit plugs into an outlet, make sure the plug has not come loose and check any nearby GFCI outlet that may have tripped. Gate openers in outdoor locations are exposed to moisture, irrigation overspray, insects, and temperature changes, so power connections deserve a careful look.

    Many gate operators also have a backup battery. A dead or weak battery can cause slow operation, inconsistent movement, beeping, or complete failure during an outage. If your operator has a battery indicator or display, check for a low-battery warning. Replacing the battery may be straightforward on some models, but battery type and wiring matter. When in doubt, have the system inspected rather than guessing.

    If You Have Solar Power

    Solar-powered gate openers need clear, functioning panels and sufficient charging time. Dust, leaves, bird droppings, or shade can reduce charging. Check that the panel is clean and aimed as intended, but do not alter wiring or settings without knowing the system. A gate that works in mild weather but stops after several cloudy days may have a charging or battery-capacity problem rather than a failed opener.

    Test the Remote, Keypad, and Other Entry Controls

    When the gate responds to one control but not another, the problem is usually with the device that is not working. Start by replacing the remote battery. Confirm you are close enough to the gate for a reliable signal and that the remote has not been damaged by moisture, drops, or extreme heat inside a vehicle.

    For a keypad, try entering the code slowly and watch for lights, beeps, or an error message. A keypad that does not light up may have a power issue, while one that lights up but will not activate the gate may need a new code, reprogramming, or service.

    Do not erase programming or reset the entire operator as your first move. A factory reset can remove remotes, keypad codes, vehicle-entry settings, and safety configurations. If your remote, keypad, telephone entry system, or app all fail at the same time, focus on the operator power and safety devices instead.

    Inspect Safety Sensors and Photo Eyes

    Most modern automatic gates use photo eyes or other monitored safety devices to detect a person, vehicle, or object in the path of the gate. If those sensors are blocked, dirty, misaligned, or damaged, the gate may refuse to close, reverse immediately, or stop partway through a cycle.

    Look for small sensors positioned across the driveway or near the travel area. Wipe the lenses gently with a clean, soft cloth. Check whether a sensor was bumped by landscaping equipment, a trash bin, or a vehicle. A flashing light on the sensor or operator often indicates misalignment or a wiring problem.

    Be careful not to bypass safety devices just to get the gate moving. Disabling or jumping a sensor can create a serious injury risk and may damage the operator. If cleaning and checking for visible alignment issues does not solve the problem, schedule service.

    Look for Signs of Mechanical Resistance

    A gate opener can only work properly when the gate itself moves freely. If the operator hums, strains, stops, or opens more slowly than usual, mechanical resistance may be the real issue. Sliding gates can develop worn rollers, damaged tracks, loose chains, or ground clearance problems. Swing gates may have sagging hinges, bent arms, shifted posts, or latches that no longer line up.

    Many operators have a manual release that disconnects the gate from the motor during an outage or service situation. Only use it if you understand your system’s instructions and can do so safely. With the operator disengaged, a properly balanced gate should move without excessive force. If it is heavy, scraping, dragging, or difficult to move, do not force it. The gate needs repair before the opener can be expected to run reliably.

    A quick visual inspection can reveal useful clues. Watch for fresh scrape marks, loose hardware, a leaning gate panel, frayed chain, cracked welds, or rollers that no longer sit correctly. Take note of when the issue happens: only while opening, only while closing, after rain, during hot afternoons, or at certain points in the travel path. That information helps a technician diagnose the problem faster.

    Know When Gate Opener Troubleshooting Should Stop

    Some gate issues are not safe DIY projects. Call for professional gate repair if you smell burning insulation, see damaged wires, hear grinding from the motor or gearbox, notice a sparking electrical connection, or find that the gate moves on its own. The same applies if the gate has been hit by a vehicle, is off its track, has a broken hinge or weld, or will not stay in a secure position.

    Commercial and community gates deserve extra caution. A malfunctioning gate can affect employee access, deliveries, customer traffic, and property security. It may also create liability if it closes unexpectedly or leaves the entrance unsecured. Fast diagnosis is usually less expensive than waiting for a minor alignment, battery, or sensor issue to become a damaged operator.

    Riggs Rescue AZ helps homeowners and businesses across the East Valley get gate systems operating safely again with clear recommendations and no-surprise service. Whether the issue is a remote, photo eye, battery, operator, hinge, or sliding gate hardware, a hands-on inspection can identify the cause without unnecessary replacements.

    Prevent the Next Gate Opener Problem

    A little routine attention goes a long way. Keep the gate path and sliding track clear, clean photo-eye lenses, test remotes before they fail completely, and pay attention to new noises or slower movement. Avoid spraying water directly into the operator housing, and do not use heavy grease or random lubricants on every moving part. The right lubricant and maintenance schedule depend on the gate design and operator model.

    If your gate works today but has started hesitating, reversing, or making unusual sounds, treat that as an early warning. Addressing it now can protect the opener, keep your property accessible, and spare you from being stuck at the driveway when you least expect it.

  • The Best Security Features for Entry Gates

    The Best Security Features for Entry Gates

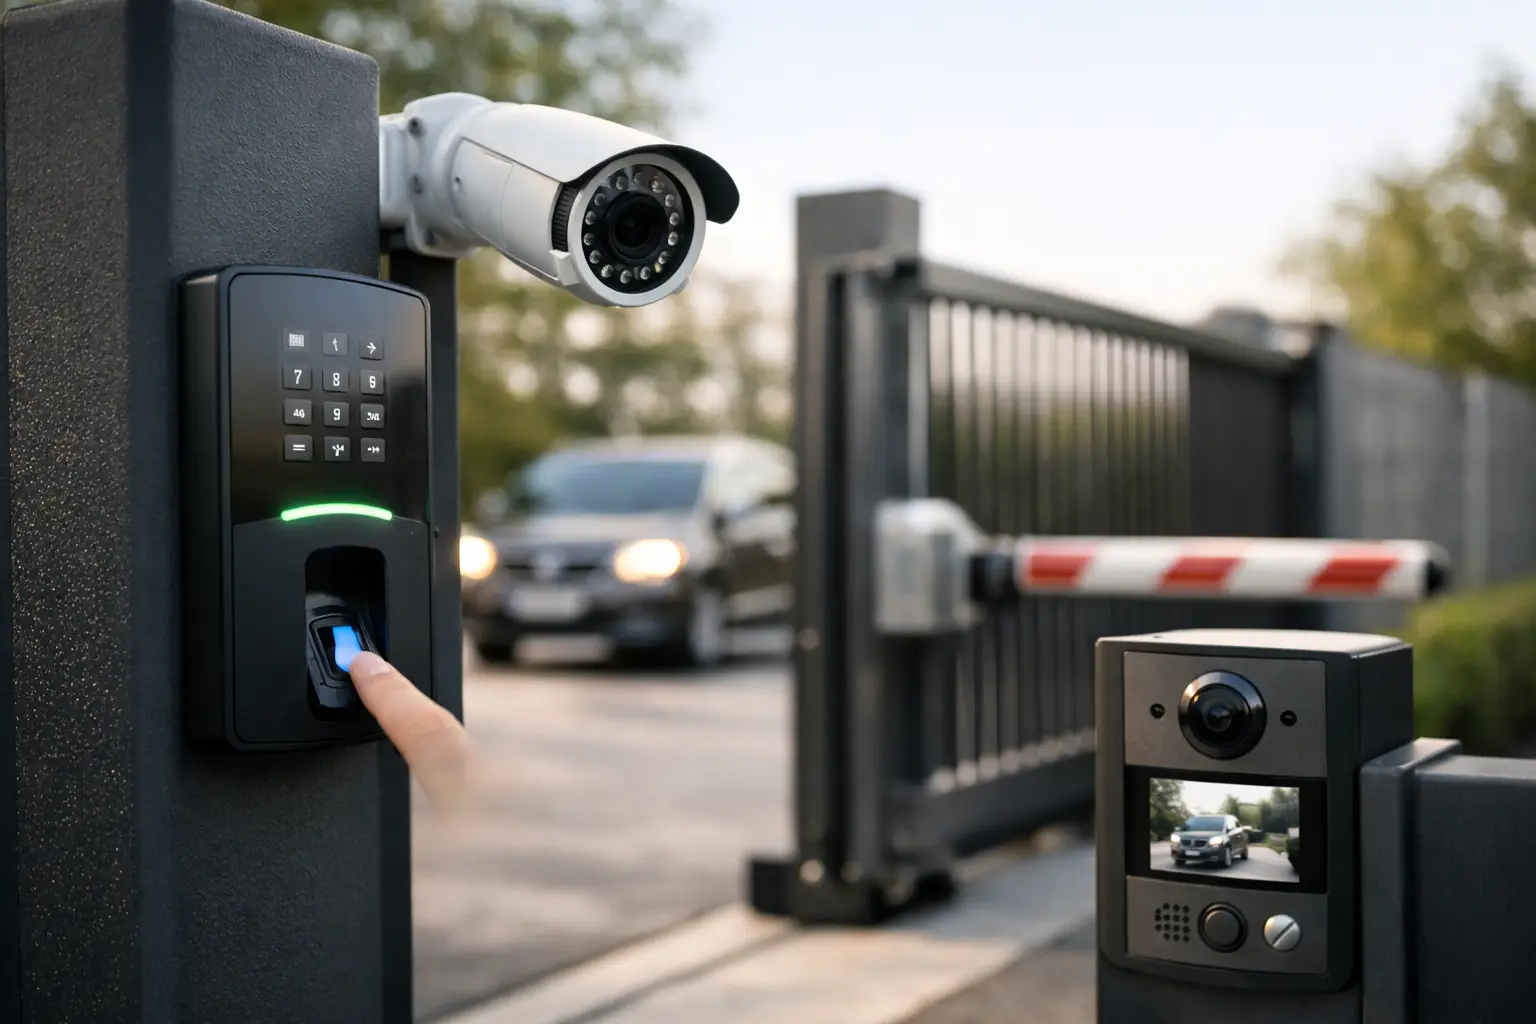
    A driveway gate should do more than look good from the street. It should help you control who enters, protect the people using it, and keep working when Arizona heat, monsoon dust, and everyday traffic put it to the test. The best security features for entry gates are the ones that match how your household or business actually uses the property, not just the ones with the longest feature list.

    For a family home, that may mean a reliable keypad, camera coverage, and safety sensors. For a small business, it could mean credential-based access, vehicle detection, and a system that records who came through after hours. The right setup creates security without making daily arrivals frustrating for residents, guests, employees, delivery drivers, or customers.

    Start With a Gate That Can Resist Forced Entry

    Smart accessories are valuable, but the gate itself is still the first line of defense. A gate that sags, has loose hinges, or can be pushed open after the operator disengages gives a false sense of security. Before adding technology, make sure the frame, posts, hinges, rollers, track, latch points, and operator mounting are in good condition.

    For swing gates, properly sized hinges and a positive locking point matter. For sliding gates, stable track alignment, quality rollers, and protected gate edges help prevent both breakdowns and easy tampering. A well-installed operator should hold the gate closed rather than relying on a light-duty latch or a worn chain.

    Commercial properties may need heavier steel construction, protected operator cabinets, and access hardware designed for frequent cycles. Residential gates often benefit from a clean, durable design that does not create hiding places around the entry. Security works best when the physical gate and the access system support each other.

    Access Control Is the Center of Gate Security

    The most effective gate security feature is controlled access. You should be able to decide who gets in, how they get in, and when their access ends. The best choice depends on the number of users and how often those users change.

    A wireless remote is convenient for household members, but it is not always enough on its own. Remotes can be lost, copied, or left in a vehicle. Rolling-code remotes offer better protection than older fixed-code systems because the access code changes with each use. If a remote goes missing, ask whether it can be removed from the operator memory instead of replacing the entire system.

    Keypads are a practical choice for homes, rental properties, and smaller offices. Look for a model that supports multiple user codes. That makes it easier to give a temporary code to a contractor, housekeeper, dog walker, or delivery service without sharing your primary code. Change codes when staff changes or when a tenant moves out.

    For properties with more users, key fobs, cards, and mobile-phone credentials offer better control. Many modern systems can show which credential opened the gate and when. That record can be useful for a business owner, community manager, or homeowner who wants more visibility over access.

    Use a Video Intercom for Visitor Verification

    A video intercom is one of the most practical upgrades for a gate that receives regular visitors. Instead of opening the gate based on a voice alone, you can see who is at the entrance and speak with them before granting access.

    For homeowners, this is especially useful when children are home, packages are being delivered, or service professionals arrive while you are away. For a business, a video intercom can help staff verify vendors and visitors without walking to the gate.

    Placement matters as much as the equipment. The camera should capture a clear view of a visitor’s face, even in bright afternoon sun or low light. It should also be positioned so someone cannot easily reach around and press the call button while staying outside the camera view.

    Cameras Help After the Alert, Not Just During It

    A gate camera is not a substitute for a secure gate, but it gives you useful information before, during, and after an access event. Cameras can alert you when someone approaches, record suspicious activity, and help confirm whether a gate was left open.

    Choose camera coverage based on the full approach, not only the gate opening. A camera aimed at the entry should capture vehicles pulling up, people using the keypad or intercom, and the gate path. Night vision and motion alerts are helpful, but overly sensitive alerts can become a nuisance when they trigger for passing traffic, blowing plants, or neighborhood animals.

    For commercial sites, cameras should cover both the outside approach and the inside exit area. That provides a clearer record if a vehicle tailgates through the gate or someone attempts to leave through an unauthorized exit.

    Safety Sensors Are Security Features Too

    A gate that closes on a vehicle, person, pet, or bicycle is not secure. It is dangerous, expensive, and likely to be taken out of service when you need it most. Proper safety devices also help prevent the gate from being manipulated or damaged during an attempted entry.

    Photo eyes create an invisible beam across the opening. If something breaks that beam while the gate is closing, the operator should stop or reverse. Edge sensors add protection by detecting contact along the moving edge of the gate. Vehicle loops or other presence sensors can keep a gate from closing on a vehicle that is still in the travel path.

    These devices need regular testing. Dust, insects, sun glare, damaged wiring, and misalignment can affect performance. A quick check-up is far less costly than a damaged gate, vehicle, or injury. Never bypass a safety sensor because it seems inconvenient. If it is causing false reversals or stopping the gate, the problem needs to be diagnosed and repaired.

    Add Vehicle Detection Without Creating an Easy Exit

    Exit systems need careful planning. A free-exit loop can open the gate automatically when a vehicle approaches from inside, which is convenient for homes and businesses. But a poorly placed loop may trigger too early or allow someone outside the gate to activate it with a vehicle near the entrance.

    A qualified gate technician can position detection equipment to fit the driveway layout and traffic pattern. In some situations, an exit keypad, credential reader, or monitored intercom is a better choice than automatic free exit. The goal is to make departure easy for authorized users while limiting opportunities for unauthorized access.

    For properties with frequent deliveries, consider how trucks turn around and where drivers will wait. A secure gate that causes vehicles to block a busy street is not a practical solution. Good gate design accounts for security, traffic flow, and emergency access at the same time.

    Protect the Operator and Plan for Power Loss

    The gate operator is the working heart of an automatic entry system. It should be mounted securely, protected from weather, and enclosed so wiring and controls are not easy to reach. Exposed wiring, damaged control boxes, and loose chain guards invite trouble and can lead to sudden failures.

    Battery backup is worth considering for many properties. A power outage should not leave your family locked out of the driveway or prevent employees from accessing a business. The right backup option depends on the operator, gate size, frequency of use, and local requirements. Backup power does have limits, so it should be tested and maintained rather than assumed to work indefinitely.

    You also need to know where the manual release is and how to use it safely. Keep the release key secure, but make sure authorized adults or managers know the procedure. For commercial sites, establish a clear plan for who handles gate access during an outage or equipment failure.

    The Best Security Features for Entry Gates Work Together

    There is no single best setup for every property. A gated home with two drivers may only need a rolling-code remote, keypad, video intercom, and properly maintained safety sensors. A busy contractor yard may need credential access, cameras, vehicle loops, operator protection, and a detailed access schedule.

    The trade-off is usually convenience versus control. The easier it is for anyone to enter or exit, the harder it can be to track access. The more layers you add, the more maintenance and occasional troubleshooting the system will require. That does not mean you should avoid technology. It means every feature should solve a real problem on your property.

    If your gate hesitates, reverses unexpectedly, opens without a clear reason, or no longer feels secure, have it checked before a small issue turns into a full failure. Riggs Rescue AZ can help homeowners and business owners assess gate hardware, access options, safety devices, and practical upgrades with clear recommendations and no surprises.

    A well-secured entry gate should feel simple when you use it: authorized people get in safely, unwanted visitors have fewer opportunities, and you are not left guessing whether the system will work when it matters.

  • Why Is Your Garage Door Squeaking So Loud?

    Why Is Your Garage Door Squeaking So Loud?

    That sharp squeak when the garage door opens at 6 a.m. can feel much louder than it really is, especially when it wakes the household or echoes through a quiet neighborhood. If you are asking, “why is garage door squeaking,” the good news is that the sound often has a clear cause. The less-good news is that ignoring it can turn a small maintenance need into worn parts, a stuck door, or an unexpected repair.

    A garage door is one of the largest moving systems in your home. It relies on rollers, hinges, tracks, springs, cables, and an opener working together under significant weight and tension. A squeak usually means one of those moving points needs attention. Finding the source early helps keep your door quieter, safer, and more reliable.

    Why Is Your Garage Door Squeaking?

    Most squeaks come from friction. In Arizona, dry air, heat, dust, and everyday use can leave metal components dry or coated with grit. When the door cycles up and down, that friction becomes a squeal, chirp, or scraping sound.

    The exact sound matters. A light squeak that happens at the same spot during every cycle may point to a roller or hinge. A groan near the top of the door can indicate a spring or bearing issue. A grinding noise, a door that shakes, or a door that stops moving is more urgent and should not be treated as a simple lubrication job.

    Dry rollers and hinges

    Garage door rollers guide the door through the track, while hinges allow the door sections to bend as they travel. Both parts move every time you use the door. When their bearings or pivot points dry out, they can squeak loudly.

    Steel rollers are especially prone to noise. They are durable, but they can become louder as they age or rust. Nylon rollers generally run more quietly, although their bearings can still wear down. Hinges may also squeak when the center pivot is dry, dirty, bent, or beginning to loosen.

    Worn or dirty bearings

    Your door has bearings at the ends of the torsion shaft and often in the center support. These small components help the shaft rotate as the door moves. When a bearing dries out or starts failing, it may squeak, grind, or make a rough rubbing sound from above the door.

    Because the noise comes from the header area, homeowners sometimes assume the opener is the problem. The opener may be fine. A failing bearing can make noise even when the motor is operating normally.

    Springs that need attention

    Garage door springs carry most of the door’s weight. Torsion springs sit above the door, while extension springs run along the sides or ceiling tracks. A spring can make noise when it is dry, but springs are not a casual DIY repair item. They are under extreme tension and can cause serious injury if handled incorrectly.

    A little squeaking from the coils may improve with the right garage-door-rated lubricant. But if you see a gap in a torsion spring, a loose cable, a crooked door, or a door that suddenly feels very heavy, stop using it and schedule service. Those signs point beyond routine maintenance.

    Track problems and loose hardware

    Tracks do not usually need lubricant. In fact, oily tracks tend to collect dust and debris, creating more problems over time. But tracks can make noise if they are dirty, bent, out of alignment, or if a roller is rubbing against the side.

    Arizona temperature swings can also contribute to gradual movement in mounting hardware. Loose bolts, brackets, or hinges may allow the door to vibrate and squeak. Do not adjust track brackets yourself, since track alignment affects the door’s path and can put the system in a bind. A technician can inspect and correct alignment safely.

    The opener may be amplifying the issue

    Sometimes the garage door itself is quiet enough, but the opener is making the overall operation sound worse. A loose opener mounting bracket, worn drive components, or a chain that needs adjustment can create rattling and vibration. That is different from a high-pitched squeak at the rollers, but the sounds can overlap.

    If the door is noisy only when the opener runs, try operating it manually only if it is safe to do so and you know how to release the opener properly. If it is still noisy by hand, the issue is likely in the door hardware. If it is quieter manually, the opener should be inspected too.

    A Safe Way to Find the Squeak

    Before applying anything, watch and listen through one complete open-and-close cycle. Stand clear of the door and keep children, pets, clothing, and hands away from moving parts. Look for obvious buildup, wobbling rollers, loose-looking hinges, or a section of the track where the sound becomes more pronounced.

    Then disconnect power to the opener before doing basic cleaning or lubrication. Wipe visible dust and debris from the tracks with a dry cloth. Avoid spraying water into the opener or soaking electrical components.

    For accessible moving metal parts, use a garage door lubricant or a silicone-based lubricant designed for garage doors. Apply a small amount to roller bearings, hinge pivot points, and the torsion spring coils if your door uses a torsion system. Open and close the door a few times to distribute it, then wipe away excess. More lubricant is not better. Excess product attracts dirt and can drip onto the floor or door.

    Do not use thick grease on tracks, and do not rely on standard household oil as a long-term solution. Products like WD-40 can help displace moisture or loosen grime, but they are not usually the best lasting lubricant for moving garage door components. The right product helps reduce friction without turning your hardware into a dust magnet.

    When Lubrication Will Not Fix a Squeaky Door

    Lubrication is helpful maintenance, not a cure-all. If the noise returns quickly, the affected part may already be worn. Rollers with cracked wheels, missing bearings, or visible wobble need replacement. A hinge with elongated holes, cracks, or a bent leaf should be replaced rather than repeatedly lubricated.

    Call for professional garage door repair if you notice any of these concerns:

    • The door jerks, shakes, binds, or moves unevenly.
    • A roller comes out of the track or the track looks bent.
    • The door feels unusually heavy when operated manually.
    • A cable is loose, frayed, or off the drum.
    • You hear grinding, popping, or a loud bang near the springs.
    • The door will not fully open, close, or stay in place.

    These symptoms can affect both safety and security. A noisy door that still works today may become a door that leaves your car trapped inside or your garage unsecured tomorrow.

    How Often Should You Service a Garage Door?

    For most homes, a quick visual check every month and basic lubrication about every six months is a reasonable starting point. Homes with frequent garage use, dusty conditions, or older doors may benefit from more regular attention. Commercial doors often need a more structured maintenance schedule because they cycle far more often and protect business operations.

    A professional tune-up goes beyond quieting the noise. It includes checking spring balance, roller condition, cable wear, track alignment, safety sensors, opener force settings, and fasteners. A balanced door reduces strain on the opener, which can help extend the life of the entire system.

    For homeowners in Gilbert, Mesa, Chandler, and nearby East Valley communities, heat and dust make preventive care particularly worthwhile. If you are unsure whether a sound is normal, a qualified technician can identify the source before it becomes a larger issue. Riggs Rescue AZ can inspect the door, explain what is causing the noise, and recommend only the repair or maintenance that makes sense for your system.

    A quiet garage door is not just a convenience. It is often a sign that the hardware is moving as it should. Give small squeaks attention early, stay clear of high-tension spring and cable repairs, and get help when the sound comes with shaking, binding, or poor door balance. That approach keeps a minor annoyance from becoming a stressful garage-door emergency.

  • How to Know a Garage Door Is Unsafe at Home

    How to Know a Garage Door Is Unsafe at Home

    A garage door that groans, shakes, or stops halfway is more than an annoyance when you are trying to leave for work. It can be a warning that a heavy moving system is no longer operating safely. Knowing how to know garage door is unsafe can help you protect your family, vehicles, employees, and property before a minor repair turns into an emergency.

    Most garage doors weigh well over 100 pounds, and larger insulated or commercial doors can weigh much more. Springs, cables, rollers, tracks, and the opener must work together every time the door moves. When one part starts failing, the door may become unpredictable quickly.

    Warning Signs Your Garage Door May Be Unsafe

    Some garage door problems are obvious. Others are easy to dismiss because the door still opens and closes. Pay attention to changes in movement, sound, and balance. A door does not need to be completely stuck to create a safety risk.

    It Moves Unevenly or Looks Crooked

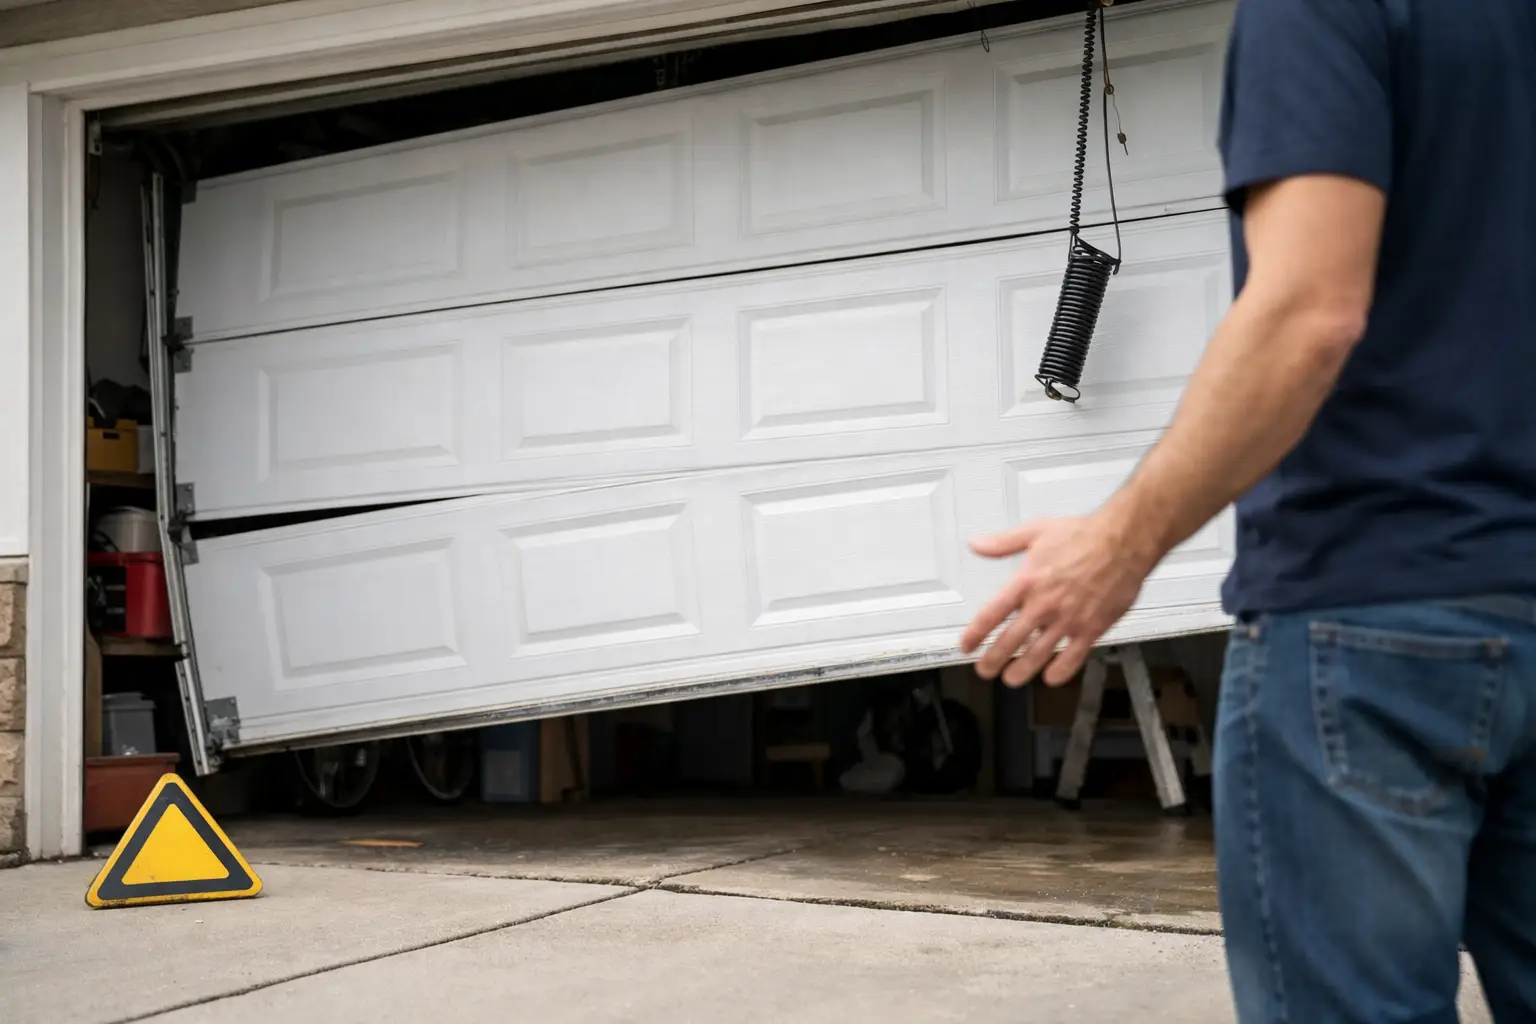
    A door should rise and lower in a smooth, level line. If one side hangs lower than the other, the door jerks as it travels, or it appears crooked in the opening, stop using it if possible. A loose or broken cable, damaged roller, track issue, or spring problem may be involved.

    An uneven door can bind in the tracks or fall suddenly. Never try to pull a crooked door straight by hand, and do not run the opener repeatedly to force it closed. That can create more damage and put anyone nearby at risk.

    It Slams Down, Falls, or Will Not Stay Open

    A properly working garage door should not race toward the floor or crash shut. It also should remain fully open without drifting down. These symptoms often point to a broken spring or a door that has lost proper counterbalance.

    Springs carry a tremendous amount of tension. They are not a homeowner repair, even for someone who is comfortable with basic tools. Keep people and vehicles clear of the opening, and arrange professional service before operating the door again.

    The Door Is Extremely Loud or Shakes Hard

    Normal garage doors make some sound, especially in a busy household or during Arizona temperature swings. But loud banging, sharp popping, grinding, screeching, or repeated rattling deserves attention. Severe vibration can signal worn rollers, loose hardware, damaged tracks, failing bearings, or an opener working harder than it should.

    Noise alone does not always mean the door will fail that day. Still, a new sound paired with rough movement is a reason to schedule a check-up soon. Catching worn parts early is usually safer and more affordable than waiting for a breakdown.

    Cables, Springs, or Hardware Look Damaged

    With the door closed and the opener disconnected from use, look from a safe distance for frayed cables, loose brackets, bent tracks, gaps in a torsion spring, or hardware pulling away from the wall or ceiling. A broken torsion spring often has a visible gap in the coil. Extension springs may hang loose or appear stretched out.

    Do not touch cables, springs, bottom brackets, or any hardware attached to the springs. Those components can release stored energy without warning. If you see damage, keep the door closed if it is safe to do so and call for service.

    How to Know Your Garage Door Is Unsafe Around Children and Pets

    Garage door safety is not only about broken parts. It is also about whether the system protects people in its path. Children and pets can move through an opening before an adult notices, which is why the door’s safety features need to work every time.

    The Auto-Reverse Feature Does Not Respond

    Modern automatic openers should reverse when the closing door encounters an object. A simple test is to place a 2-by-4 piece of wood flat on the floor beneath the center of the open door, then close the door using the wall button or remote while staying clear of the opening. When the door touches the wood, it should reverse promptly.

    If it continues closing, presses hard on the object, or only reverses after a delay, stop using the automatic function until it is adjusted or repaired. Do not test this feature with a child, pet, hand, foot, or vehicle.

    The Photo Eyes Are Blocked, Misaligned, or Unreliable

    The photo eyes are the small safety sensors mounted near the bottom of the tracks. They project an invisible beam across the opening. If something breaks that beam while the door is closing, the door should reverse.

    Check that both sensors are clean, securely mounted, and facing each other. Boxes, bicycles, landscaping tools, or dirt can interfere with the beam. If the opener closes only when you hold down the wall button, or if it closes inconsistently, the sensors may be misaligned or damaged. A quick adjustment may solve the problem, but recurring sensor trouble should be inspected rather than ignored.

    The Remote or Wall Button Behaves Unpredictably

    A door that opens on its own, responds intermittently, or will not stop when commanded needs prompt attention. The cause may be as simple as a failing remote battery, but it can also involve wiring, a wall control issue, or an opener malfunction.

    Until the issue is identified, keep remotes out of children’s reach and avoid leaving the door open unattended. For businesses, an unreliable door can also leave inventory, equipment, and access points exposed after hours.

    When the Opener Is the Problem – and When It Is Not

    It is easy to blame the opener whenever a garage door will not move. In many cases, though, the opener is reacting to a mechanical problem with the door. A good opener cannot safely lift a door with a broken spring, damaged cable, or jammed track.

    One clue is whether the door feels unusually heavy when the opener is disengaged. Only perform this check when the door is fully closed and you can do so safely. Pull the emergency release cord, then lift the door manually a short distance. A balanced door should feel manageable and stay near the point where you leave it. If it is very heavy, drops, or cannot be moved smoothly, reconnect nothing and call a technician.

    Do not keep replacing opener parts to compensate for a door that is out of balance. That can burn out the opener and leave the underlying safety issue unresolved.

    What to Do When You Think a Garage Door Is Unsafe

    Your next step depends on the condition of the door. If it is hanging crooked, has a broken spring or cable, is off its track, or will not stay open, keep everyone away from the door and do not attempt to operate it. If you can safely keep it closed, do so. If it is stuck open, avoid standing or parking underneath it and secure the area until help arrives.

    For less urgent concerns, such as increasing noise, slow travel, or an unreliable sensor, schedule an inspection before the problem progresses. A technician can check spring tension, cable condition, roller wear, track alignment, opener force settings, and safety reversal features. This is especially worthwhile before summer heat puts extra strain on a frequently used door or before a business enters a busy season.

    Riggs Rescue AZ provides clear recommendations, fast local service, and no-surprise guidance for homeowners and businesses throughout the East Valley. The goal is not to sell a replacement when a safe repair will do. It is to make sure your door protects the people and property that depend on it.

    A garage door should feel routine, not risky. If yours has started acting differently, trust that change and have it checked before the next time you press the button becomes the moment it fails.

  • When to Call for Garage Opener Repair in Chandler

    When to Call for Garage Opener Repair in Chandler

    A garage door that will not open when you are headed to work is more than an inconvenience. It can trap your vehicle, leave your home exposed, or create a safety concern for your family. For garage opener repair, Chandler homeowners need clear answers fast – not a guess, a hidden fee, or a temporary patch that fails again next week.

    The opener is the motorized unit that controls your garage door, but it works as part of a larger system. Springs, cables, rollers, tracks, sensors, the door itself, and the opener all have to do their jobs correctly. Knowing what you are seeing or hearing can help you make a smart decision before a small problem becomes a stuck door.

    Common Signs You Need Garage Opener Repair in Chandler

    An opener problem is not always obvious. Sometimes the motor does nothing at all. Other times, it hums, flashes, or runs for a few seconds while the door stays put. Each symptom points to a different possible issue.

    If the wall button works but the remote does not, start with the simple possibilities. Replace the remote battery and make sure the opener has power. A tripped GFCI outlet, a breaker issue, or an unplugged motor can look like a major failure from the driveway. If a fresh battery and a power check do not solve it, the remote may need programming or the receiver may need service.

    When the opener runs but the door does not move, do not keep pressing the button. A disconnected trolley, stripped internal gear, broken drive belt or chain, or a door that is too heavy for the opener can cause this problem. Continued operation can put more strain on the motor and may turn a repairable issue into an opener replacement.

    A door that starts down and immediately reverses often involves the safety sensors near the bottom of the tracks. Dust, direct sunlight, loose wiring, or sensors that are out of alignment can interrupt the invisible beam between them. Clean the sensor lenses gently and check that both units are facing each other. If the indicator lights are not steady or the problem continues, it is time for a professional inspection.

    Unusual sounds deserve attention, too. Grinding can indicate worn gears. A loud screech may come from dry or worn door hardware. Repeated clicking can signal an electrical issue, while a heavy bang may mean a spring or other door component has failed. The sound alone does not provide a final diagnosis, but it is a useful detail to share when scheduling service.

    Do Not Assume the Opener Is the Only Problem

    Many homeowners call for garage opener repair in Chandler when the actual issue is the garage door’s balance. The opener is designed to guide a properly balanced door, not lift the full weight of a door with a broken spring or failing cable.

    A properly operating door should feel reasonably light when disconnected from the opener and moved by hand. That test should only be performed when it is safe to do so and when you understand how to release the emergency cord. Never attempt it if a cable is loose, a spring appears broken, the door is crooked, or the door is stuck partway open. Those conditions call for professional service right away.

    A door that feels heavy, slams down, hangs unevenly, or will not stay in place may have a spring, cable, roller, or track issue. Forcing the opener to work against that resistance can burn out the motor, bend components, or create a more dangerous situation. A technician should inspect the entire system, then explain whether the opener needs repair, the door needs adjustment, or both.

    Safety First With Springs and Electrical Parts

    Garage door springs hold significant stored tension. Cables can also shift suddenly if a spring breaks or a drum comes loose. These are not good do-it-yourself repairs, even for a handy homeowner. Stay clear of the door, keep children and pets away from the area, and avoid pulling on cables or touching spring hardware.

    Electrical troubleshooting has limits as well. Checking that the opener is plugged in is reasonable. Removing motor covers, replacing internal boards, or working around damaged wiring is better left to a trained technician. The goal is not just to get the door moving once. It is to make sure it opens and closes safely every day.

    Repair or Replacement: What Makes Sense?

    Not every opener failure requires a new unit. A worn gear, failed capacitor, damaged trolley, misaligned sensors, or remote programming issue may be repaired at a reasonable cost, particularly when the opener is otherwise in good condition.

    Replacement can be the better value when an opener is older, repeatedly failing, or missing modern safety features. It may also make sense if repair costs are approaching the cost of a new unit. A reliable new opener can offer quieter operation, battery backup, improved lighting, smartphone control, and better security features, depending on the model.

    The right choice depends on the age and condition of the unit, how often the door is used, and the condition of the door itself. A heavy wood door, an insulated steel door, and a frequently used commercial door do not place the same demands on an opener. An honest technician should explain the options and pricing clearly instead of pushing a replacement when a repair will do the job.

    Choosing the Right Opener for Your Door

    If replacement is recommended, the drive type matters. Belt-drive openers are a popular choice for attached garages because they run quietly. Chain-drive models are durable and can be a practical option for detached garages or homeowners who prioritize budget. Wall-mount openers free up ceiling space and can be a strong fit where overhead clearance is limited, but installation depends on the garage layout.

    For homes in Chandler, battery backup is worth considering. A power outage should not leave you unable to access your vehicle or secure the garage. Smart controls can also be convenient for families, allowing you to check door status or close the door remotely. Convenience features should support a dependable system, not replace basic safety and proper installation.

    What to Do Before Help Arrives

    If your garage door is closed and secure, leave it closed until the issue is diagnosed. If it is open and will not close, avoid leaving the property unattended if possible. Do not place ladders, chairs, or other objects under the door to hold it up.

    Before calling, take note of what happened. Did the door stop while opening? Does the motor make noise? Are sensor lights flashing? Has the remote stopped working, or does the wall control fail too? These details help narrow the problem and allow the service team to arrive prepared.

    If the door is operating but sounds rough, do not wait until it fails completely. Early service often prevents avoidable damage to rollers, hinges, opener gears, and other parts. Regular check-ups also help identify loose hardware, worn components, and balance issues before they interfere with your routine.

    Fast, Straightforward Help for a Stuck Door

    A garage door system should feel dependable: press the button, the door moves smoothly, and you get on with your day. When that stops happening, you deserve a local team that can assess the full system, explain the repair in plain language, and provide transparent pricing with no surprises.

    Riggs Rescue AZ helps homeowners and businesses with opener repairs, replacements, door repairs, and gate service throughout the East Valley. Whether the fix is a sensor adjustment, a damaged gear, a worn-out opener, or a door problem placing stress on the motor, the focus should be on a safe, lasting repair.

    If your opener is making new noises, reversing without reason, or leaving your door stuck, treat it as an early warning. Getting it checked now can protect your access, your security, and one less part of your day that needs rescuing.

  • How to Fix Garage Door Remote Problems Fast

    How to Fix Garage Door Remote Problems Fast

    A garage door remote usually fails at the most inconvenient moment: when you are pulling into the driveway with groceries, trying to leave for work, or arriving at your business after hours. The good news is that learning how to fix garage door remote problems often starts with a few simple checks. The key is figuring out whether the remote is actually the issue or whether the opener, door, or safety system needs attention.

    Before you take apart anything, make sure the garage door is fully closed or in a stable position. Never work near springs, cables, rollers, or a moving door. Those components are under serious tension and should be handled by a trained garage door technician.

    How to Fix Garage Door Remote Issues Step by Step

    Start with the quickest, least expensive possibilities. A weak battery, an accidental lock setting, or a lost connection between the remote and opener can look like a major breakdown when it is not.

    Replace the remote battery first

    A dead or weak battery is the most common reason a garage door remote stops working. If the remote has an LED light, press a button and watch for a dim light, flickering light, or no light at all. Those are good signs that the battery needs replacement.

    Open the battery compartment and use the same battery type listed inside the remote or in its manual. Common options include coin-style batteries and small 9-volt batteries. Install the new battery with the positive and negative sides facing the correct direction, then test the remote from a few feet away from the door.

    Do not assume a new battery is good simply because it is new. Batteries stored in a hot car or garage can lose power, which is especially relevant during Arizona summers. If the remote still does not work, try another fresh battery before moving to the next step.

    Check whether the opener has power

    If your remote does not work and neither does the wall-mounted control button inside the garage, the issue may not be the remote at all. Check whether the opener unit is plugged into its outlet and whether the outlet has power. A tripped GFCI outlet, breaker, or unplugged power cord can shut down the entire system.

    If the opener light comes on but the motor will not respond, look for flashing lights or beeps. Many modern openers use these signals to point to a safety sensor, travel-limit, or internal opener problem. The pattern varies by manufacturer, so avoid guessing if the door is acting unpredictably.

    Test the wall button and a second remote

    Testing another control helps narrow down the source of the trouble. If the wall button works but your remote does not, the opener itself is likely receiving power and the remote may need a battery, reprogramming, or replacement.

    If one remote works while another does not, focus on the nonworking remote. If none of the remotes work but the wall button does, the opener may have lost its programmed remotes or may be dealing with radio interference.

    This quick comparison can save time and prevent you from replacing a remote when the actual problem is elsewhere.

    Make sure vacation lock mode is not on

    Many wall controls have a lock or vacation feature that disables wireless remotes for security. It is useful when you are away, but it can be activated by accident. The wall button may still operate the door normally while every handheld remote stops working.

    Look for a button marked “Lock,” “Vacation,” or a padlock symbol on the wall control. On many models, pressing and holding that button for a few seconds turns the feature off. Check your opener instructions if you are unsure, since button functions differ by model.

    Move closer and look for interference

    A remote that works only when you are very close to the garage may have a range problem. Start by standing near the door and trying again. If it works up close but not from the driveway, inspect the remote battery and antenna on the opener.

    The opener antenna is usually a short wire hanging from the motor unit. It should hang straight down and should not be cut, tucked behind metal, or wrapped around another wire. Avoid adjusting internal opener wiring yourself.

    Radio interference can also reduce remote range. LED bulbs in or near the opener are a surprisingly common cause. Some low-quality LED bulbs give off interference that blocks the remote signal. Try removing the bulb temporarily and test the remote again. If the range improves, install a garage-door-opener-compatible LED bulb.

    Other possible sources include wireless devices, charging equipment, security cameras, and damaged electrical components. Interference can be difficult to identify, so persistent range issues are a good reason to schedule service rather than keep replacing remotes.

    Reprogram a Garage Door Remote

    If the battery is fresh, the opener has power, and the remote still will not respond, it may have lost its connection to the opener. This can happen after a power outage, battery change, opener repair, or an accidental press of the opener’s learn button.

    Most openers have a “Learn,” “Program,” or “Smart” button on the motor unit. It is often located behind the light cover, near the antenna wire, or on the back panel. Press the learn button once, then press the desired button on your remote within the time window specified for your opener. The opener light may flash or click to confirm programming.

    Be careful not to hold the learn button down for too long. On many models, holding it can erase all programmed remotes and keypads. That is not dangerous, but it can create more work if several household members, tenants, or employees use different controls.

    If your opener is older, the programming process may involve DIP switches rather than a learn button. In that case, the switch positions on the remote must match the opener or receiver exactly. If you are not comfortable identifying the correct system, a technician can set it up without risking a lost programming code.

    When the Problem Is the Door, Not the Remote

    A remote can be working perfectly while the garage door refuses to move because the door itself has a mechanical issue. This distinction matters. Forcing an opener to lift a damaged or heavy door can turn a manageable repair into an opener replacement.

    With the door closed, look for obvious signs such as a crooked door, loose cable, bent track, broken roller, or a gap in the torsion spring above the door. Do not touch the springs or cables. A broken spring is one of the most common reasons a door will not open, and it requires professional repair.

    Also check the photo-eye safety sensors near the bottom of each track. If their lenses are dirty, blocked, or out of alignment, the door may refuse to close or may reverse immediately after starting down. Wipe the lenses with a soft cloth and remove boxes, tools, or debris from their path. If one sensor light is off or blinking, alignment may be needed.

    Signs You Should Call a Garage Door Professional

    A new battery and simple reprogramming are reasonable homeowner fixes. Stop troubleshooting and call for help if the opener hums without moving the door, the door is crooked, a cable is loose, a spring appears broken, or the opener repeatedly reverses for no clear reason.

    It is also smart to bring in a professional when remotes keep losing programming, the range suddenly drops throughout the property, or the opener is more than 10 to 15 years old. Sometimes the most affordable fix is a compatible replacement remote or receiver. Other times, an aging opener has reached the point where replacing it provides better reliability, quieter operation, and updated safety features.

    For homeowners and small businesses in Gilbert, Mesa, Chandler, Queen Creek, and nearby East Valley communities, Riggs Rescue AZ can inspect the remote, opener, sensors, and door as one system. You get clear answers before work begins, with no surprises and no residential service or trip charge.

    A garage door remote should make coming home or opening up for the day easier, not add another problem to your schedule. If the simple checks do not bring it back to life, getting a fast, honest diagnosis is the safest way to get dependable access again.

  • Garage Door Remote Programming Without the Guesswork

    Garage Door Remote Programming Without the Guesswork

    A remote that suddenly stops opening the garage can turn a normal morning into a scramble. Whether you have a new remote, replaced an opener battery, moved into a new home, or lost access after a power outage, garage door remote programming is usually straightforward when the opener and remote are compatible. The key is knowing which system you have and avoiding a few common mistakes that can erase working remotes or create a security concern.

    For homeowners and small businesses, a working remote is more than a convenience. It is part of daily access, property security, and the safe operation of your garage door system. Here is how to approach programming with confidence, along with the signs that it is time to call for help.

    Start With the Right Remote and Opener

    Before pressing any buttons, confirm that the remote is designed to work with your specific garage door opener. The brand name alone is not always enough. Many manufacturers have used different radio frequencies, coding technologies, and programming methods over the years.

    A universal remote can be a good solution, especially when replacing an older transmitter or consolidating multiple garage doors into one device. Still, universal does not mean compatible with every opener ever made. Check the remote packaging, the instruction sheet, or the opener motor unit for compatibility details.

    The motor unit is the box mounted to the ceiling inside the garage. Look for its manufacturer, model number, and the color of the Learn, Program, or Smart button. That button color can help identify the opener generation and programming method. Do not guess based on the color of the garage door or the wall control. The button on the motor unit is what matters.

    If the remote is old, inspect the battery before assuming it needs programming. A weak battery can make a remote appear unresponsive, work only from a short distance, or operate inconsistently. Replacing the battery is inexpensive and often solves the problem.

    Garage Door Remote Programming: The Basic Process

    Most modern openers use a Learn or Program button on the motor unit. When that button is pressed briefly, the opener enters a short learning mode. You then press the desired button on the remote to pair it.

    The exact timing varies by manufacturer, but the general process is similar:

    1. Make sure the garage door is fully closed and the area around it is clear.
    2. Locate the Learn or Program button on the opener motor unit. It may be behind a light cover or near the antenna wire.
    3. Press and release the button once. A small LED may light up or blink to show the opener is ready.
    4. Within about 30 seconds, press and hold the button on the remote that you want to use. Release it when the opener light flashes, clicks, or the door moves.

    Test the remote from outside the garage once programming is complete. Stand clear of the door while testing, especially if children, pets, vehicles, or stored items are nearby.

    A brief press of the Learn button normally adds one remote. Holding that button down for several seconds can erase all programmed remotes from many opener models. That can be useful after a remote is lost or stolen, but it is frustrating if done by accident. If every remote stops working after you attempt programming, the opener may have been cleared and each remote will need to be added again.

    Programming Through a Wall Control

    Some newer openers allow remote setup through the wall-mounted control panel rather than the motor unit. This can be easier if the opener is difficult to reach, but the menu labels vary widely. You may see options such as Program, Device Setup, Remote, or Add Accessory.

    Follow the instructions for your specific wall control rather than using a generic sequence. Programming methods can differ even between models made by the same company. If the wall control does not have a menu or program button, use the Learn button on the motor unit instead.

    Why a Remote May Not Pair

    When a remote will not program, the issue is not always the remote. Start by checking the easy items: fresh battery, correct remote model, and a fully powered opener. If the opener lights are off and the wall control is dead, the problem may be a tripped outlet, GFCI outlet, breaker, or opener power issue.

    Distance and interference can also affect programming. Try standing close to the motor unit while pairing the remote. LED bulbs, wireless security equipment, nearby electronics, and certain vehicle accessories can sometimes interfere with remote signals. If a remote works only near the garage but not from the driveway, interference or a failing receiver may be involved.

    A door that will not move after the remote appears to pair may have a separate mechanical or safety problem. Check whether the wall button operates the door. If it does, the issue is likely remote-related. If neither the wall control nor the remote moves the door, do not keep cycling the opener. The door could have a broken spring, damaged cable, obstructed safety sensor, or opener issue that needs a professional inspection.

    Security Steps After a Lost Remote

    A misplaced remote deserves more attention than a dead battery. If it was lost near your home, stolen from a vehicle, or left behind after a tenant or employee moved on, clear the opener’s stored codes and program only the remotes you still control.

    This step removes access from the missing remote. After clearing the codes, reprogram your remotes, keypad, vehicle controls, and any compatible smart access devices. It takes a little time, but it is a sensible way to protect your home, tools, vehicles, or business inventory.

    For commercial properties, be careful about handing out remotes without a simple access plan. Keep a record of who has each remote, retrieve them when staff changes occur, and clear codes when a transmitter cannot be accounted for. For busy shops, storage spaces, and small warehouses, that small bit of organization can prevent an avoidable security gap.

    When Vehicle Programming Is Different

    Built-in vehicle garage controls are convenient, but they do not always follow the same steps as a handheld remote. Many cars use an integrated system that first copies the signal from an existing remote and then must be synchronized with the garage opener’s Learn button.

    The vehicle owner’s manual is the best source for the button sequence inside the car. In many cases, you will need a working handheld remote during setup. If you no longer have one, program a compatible handheld remote first, then use it to train the vehicle system.

    Do not program a vehicle control while the car is running inside the garage. Pull into the driveway or keep the garage well ventilated. It is a small safety detail that is easy to overlook when you are focused on getting the buttons to cooperate.

    When to Call a Garage Door Professional

    There is no need to turn a simple remote setup into a service call. But there are situations where professional help saves time, prevents damage, and gets your access restored faster. Call for service if the opener will not enter programming mode, multiple remotes fail despite new batteries, the door reverses unexpectedly, or the wall control and remote both stop working.

    You should also get help if your opener is an older model with unreliable operation, if you need to coordinate remotes for multiple doors or gates, or if the opener has been damaged by lightning, water, pests, or a power surge. Replacing an aging opener can be more cost-effective than repeatedly troubleshooting a failing receiver or outdated remote system.

    Riggs Rescue AZ can help homeowners and business owners identify compatible remotes, restore access, and diagnose the bigger problem when programming is only part of the issue. Clear explanations and transparent options matter, particularly when the garage door is your main way in and out of the property.

    A remote should work with a simple press, not a ritual of standing in one exact spot and hoping for the best. If yours is inconsistent, take care of it while the problem is still a small one – reliable access starts with a door system you can count on every day.

man-in-blue-shirt

Exclusive Residential Service Offer 🏷️

For a limited time, homeowners can enjoy exclusive savings with a FREE Service Call, No Trip Charge, and a FREE Garage Door Safety Inspection on qualifying services.

Offer Includes :